The 25mph Electric Skateboard
Inspiration
Honestly, I just did this because I wanted to learn about high-voltage applications and a little bit of shop training. I don't even know how to skateboard. Definitely fell multiple times while riding this thing. Also maybe I did it because I wanted the fantastic and beautiful Frank Dubose to ride my skateboard, for does there exist a better compliment in this world?
How does it work?
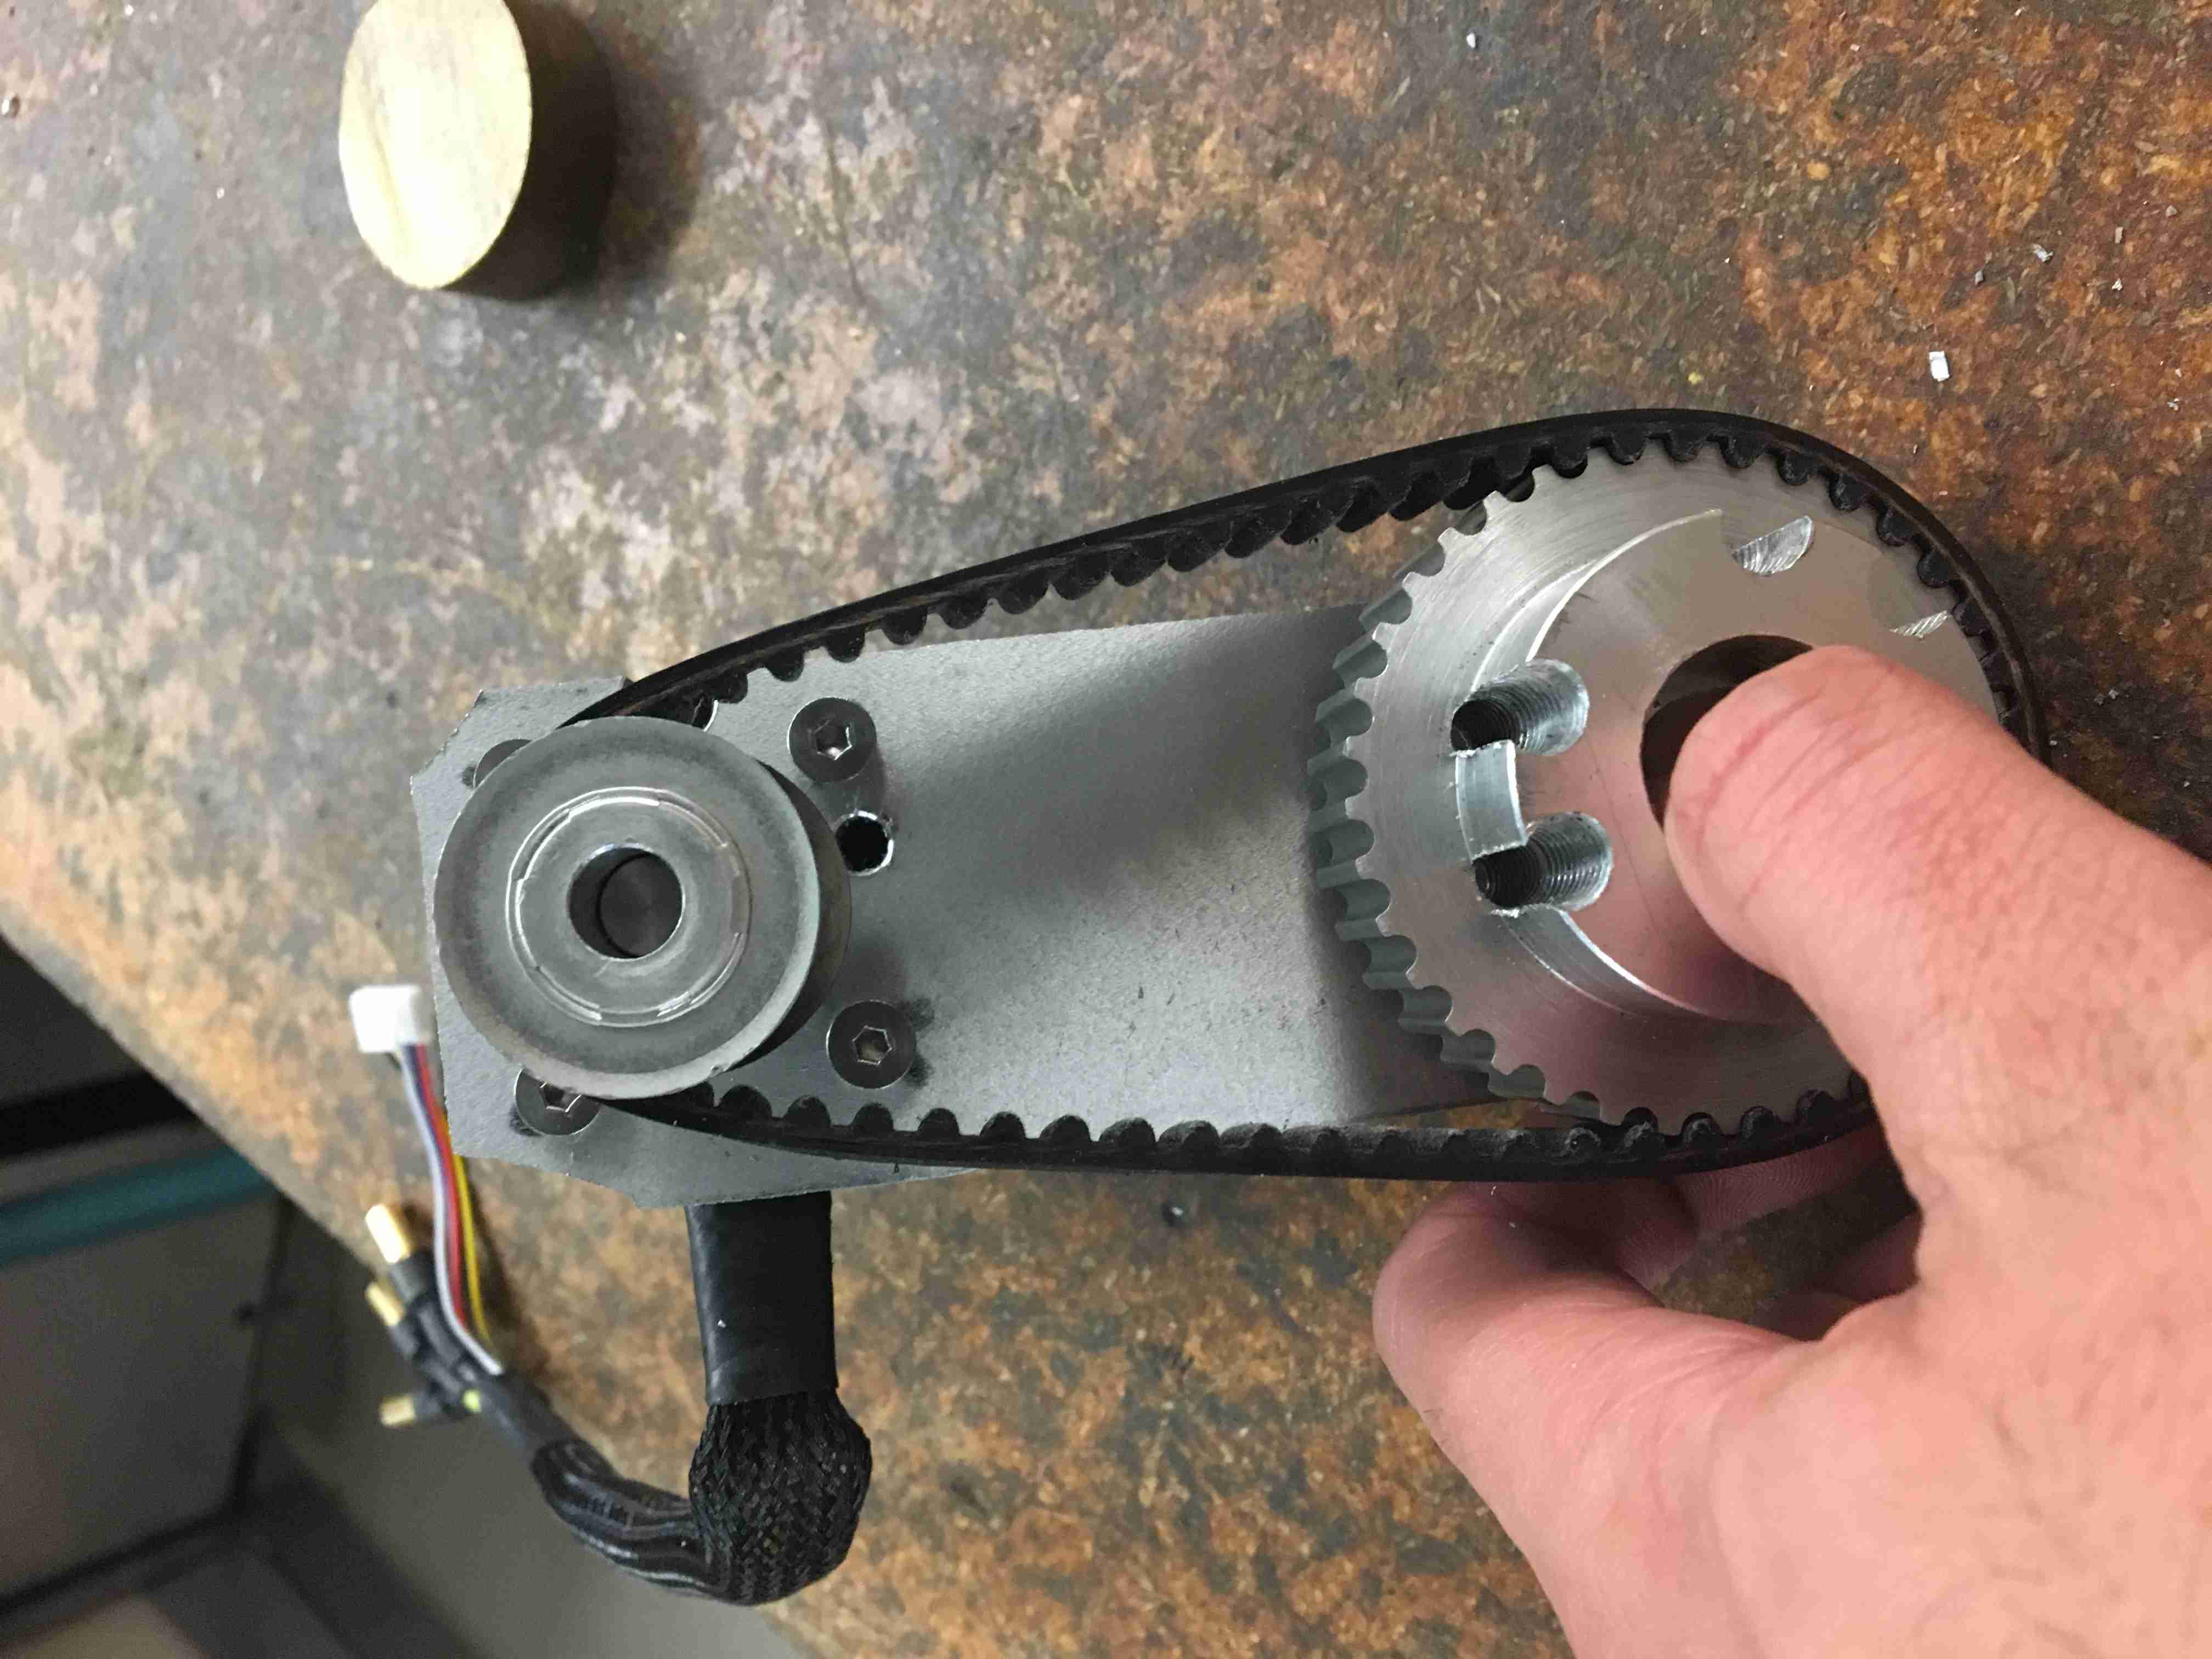
I think the circuit is the most important part about this, but it's basically a very simple timing-belt driven wheel. Fix a pulley to the wheel and another one to the motor, and then have a belt that connects the two.
The mechanical part is pretty simple, except that you also need to somehow attach the motor to the skateboard axle. You do this via a motor mount, which holds the motor in the air at a certain distance from the wheel pulley.
There are three ways of doing this:
- You can weld the motor mount to the axle. Best way, but lots of work if you don't have a welder.
- You can clamp the motor mount to the axle by screwing two pieces of aluminum around the axle as seen here . Sounds good, but it's expensive.
- You can drill through the axle and the piece of aluminum and hold it in place. Sounds like the best way, but this is actually horrible. Too many vibrations will break it quickly and too much work on assembly.
The Circuit
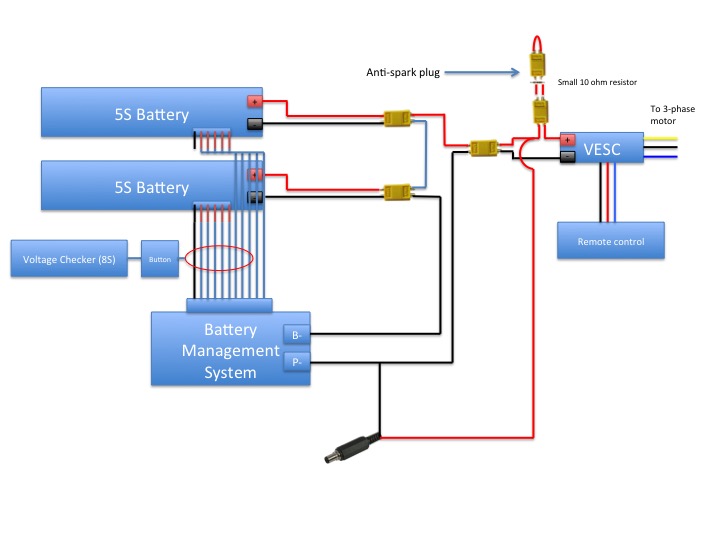 Now let's talk about the circuitry. You have a 5S (21.5V) battery that you connect in series with another one, to make it 43V.
Then you use an Electric Speed Controller (ESC) specced for 10S batteries and ~60A, to control the speed of a motor that is also specced for a 10S motor and runs at 60A.
We use a remote control that interfaces with the ESC to control the speed of the motor.
Now let's talk about the circuitry. You have a 5S (21.5V) battery that you connect in series with another one, to make it 43V.
Then you use an Electric Speed Controller (ESC) specced for 10S batteries and ~60A, to control the speed of a motor that is also specced for a 10S motor and runs at 60A.
We use a remote control that interfaces with the ESC to control the speed of the motor.
You then buy a Battery Management System (BMS) that is also specced for 10S and a discharge rate of ~45A and a pulse rate of at least 60A. The Battery Management System allows you to charge the LiPo batteries one cell at a time, which increases lifetime and prevents the battery from bursting into flames. Having an internal BMS also allows you to easily charge the battery with just a DC jack than using conventional methods of charging each 5S battery separately with a balance charger.
To check the battery level, we have a voltage checker with reads out the voltage of the individual batteries. This allows us to continuously check that the BMS is working, but because we don't always want to check, we have a button that we press to turn it on.
Lastly, we have an anti-spark plug that turns on the ESC. The anti-spark plug catches the spark that happens with you connect a high voltage to a free line. If you don't suppress the spark, the connection with begin to oxidize and it'll eventually oxidize to the point of high resistance and difficulty plugging in and out. We use two XT-60 connectors, one that connects with a 10ohm resistor, and the other that is free. The 10 ohm resistor catches the spark, and then plugging in the other XT-60 allows for the circuit to take the path of least resistance away from the 10ohm resistor.
Design decisions
Actual Skateboard
I bought extremely cheap trucks here, with 83mm wheels. If I would do it again, I'd buy caliber or Paris trucks. These were definitely a poorer quality.The actual board I bought here. Not extremely proud of my design choices, but I was more excited about making it electric anyway.
Motor, Batteries, and ESC
I used this to to figure out I needed a solid 25mph ratio (you can use an efficiency of 80% on higher voltage, lower Kv motors). I added 10S batteries on a 200 kV motor (It was the cheapest one I could find and the 10S batteries were on sale here). I spent too much time thinking about how much the 200Kv motors cost, but in general, you should just get a motor that fits your voltage requirement (higher voltage allows for lower Kv). In general, for lower power losses, you want to use a higher voltage.I used the VESC because it was the cheapest and most versatile high voltage ESC on the market. I was planning on going 10S and having a discharge of at least 80A, which means the ESC needs to hold at least 100A (add 20% for safety). Hobbyking’s catalog that fit that price was a ton. I got it on sale, but you can find it here.
Belt Decisions
You need at least I chose GT5 belts because backlash upon stopping is better than the trapezoidal timing belt system in HTD belts.. If I’d do it again, I’d probably choose GT3mm as the pitch is smaller and hence the grip is better. My GT5 belt required me to have a large center to center distance in order to maintain the minimum of 5 teeth in mesh. Use this website to help with those calculations.Battery Management System and Voltage Checker
We got this beeper to give us accurate battery measurements. I bought this BMS, which worked like a charm.Motor Mount
Lastly, for the motor mount, I wanted to learn welding and wanted to really try my best at this, so I didn’t buy the clamp online. If you really don’t care about learning, just buy a clamp online here . It’s so much easier. However, make sure you buy the right axle with the clamp. If you want just an aluminum plate, you can get a solid one here . I ended up using scrap metal at the machine shop for more aluminum as one iteration after the other failed.Remote Controller
I used the following remote controller . I tried building my own using an NRF24L01, but it doesn’t do adaptive frequency hopping, which is necessary for anything moving around. Wasted a couple days, but that's fine. It's all fine.Power Supply for Battery Charging
I ended up just using the ones used for hoverboards. Super cheap and only needed a slight adaptation to the plug in order to make it work for the DC plug.Building the actual skateboard
Putting together the skateboard
 I bought some very cheap trucks online. Horrible decision as the material they had was very brittle in the end.
These had two layered aluminum alloys that were designed for long-boarding, but not strong enough for electric skateboarding.
Going back, I would probably choose Paris or Caliber trucks. Do not go cheap on the trucks. They’re the structural aspect that should be respected the most.
I bought some very cheap trucks online. Horrible decision as the material they had was very brittle in the end.
These had two layered aluminum alloys that were designed for long-boarding, but not strong enough for electric skateboarding.
Going back, I would probably choose Paris or Caliber trucks. Do not go cheap on the trucks. They’re the structural aspect that should be respected the most.
 Blurry picture, but I bought some fake flywheels online with bearings and a spacer. You need at least a 5/8” spacer and get 83mm wheels, although I would try to get as large of wheels as possible in order to not feel vibrations during the ride.
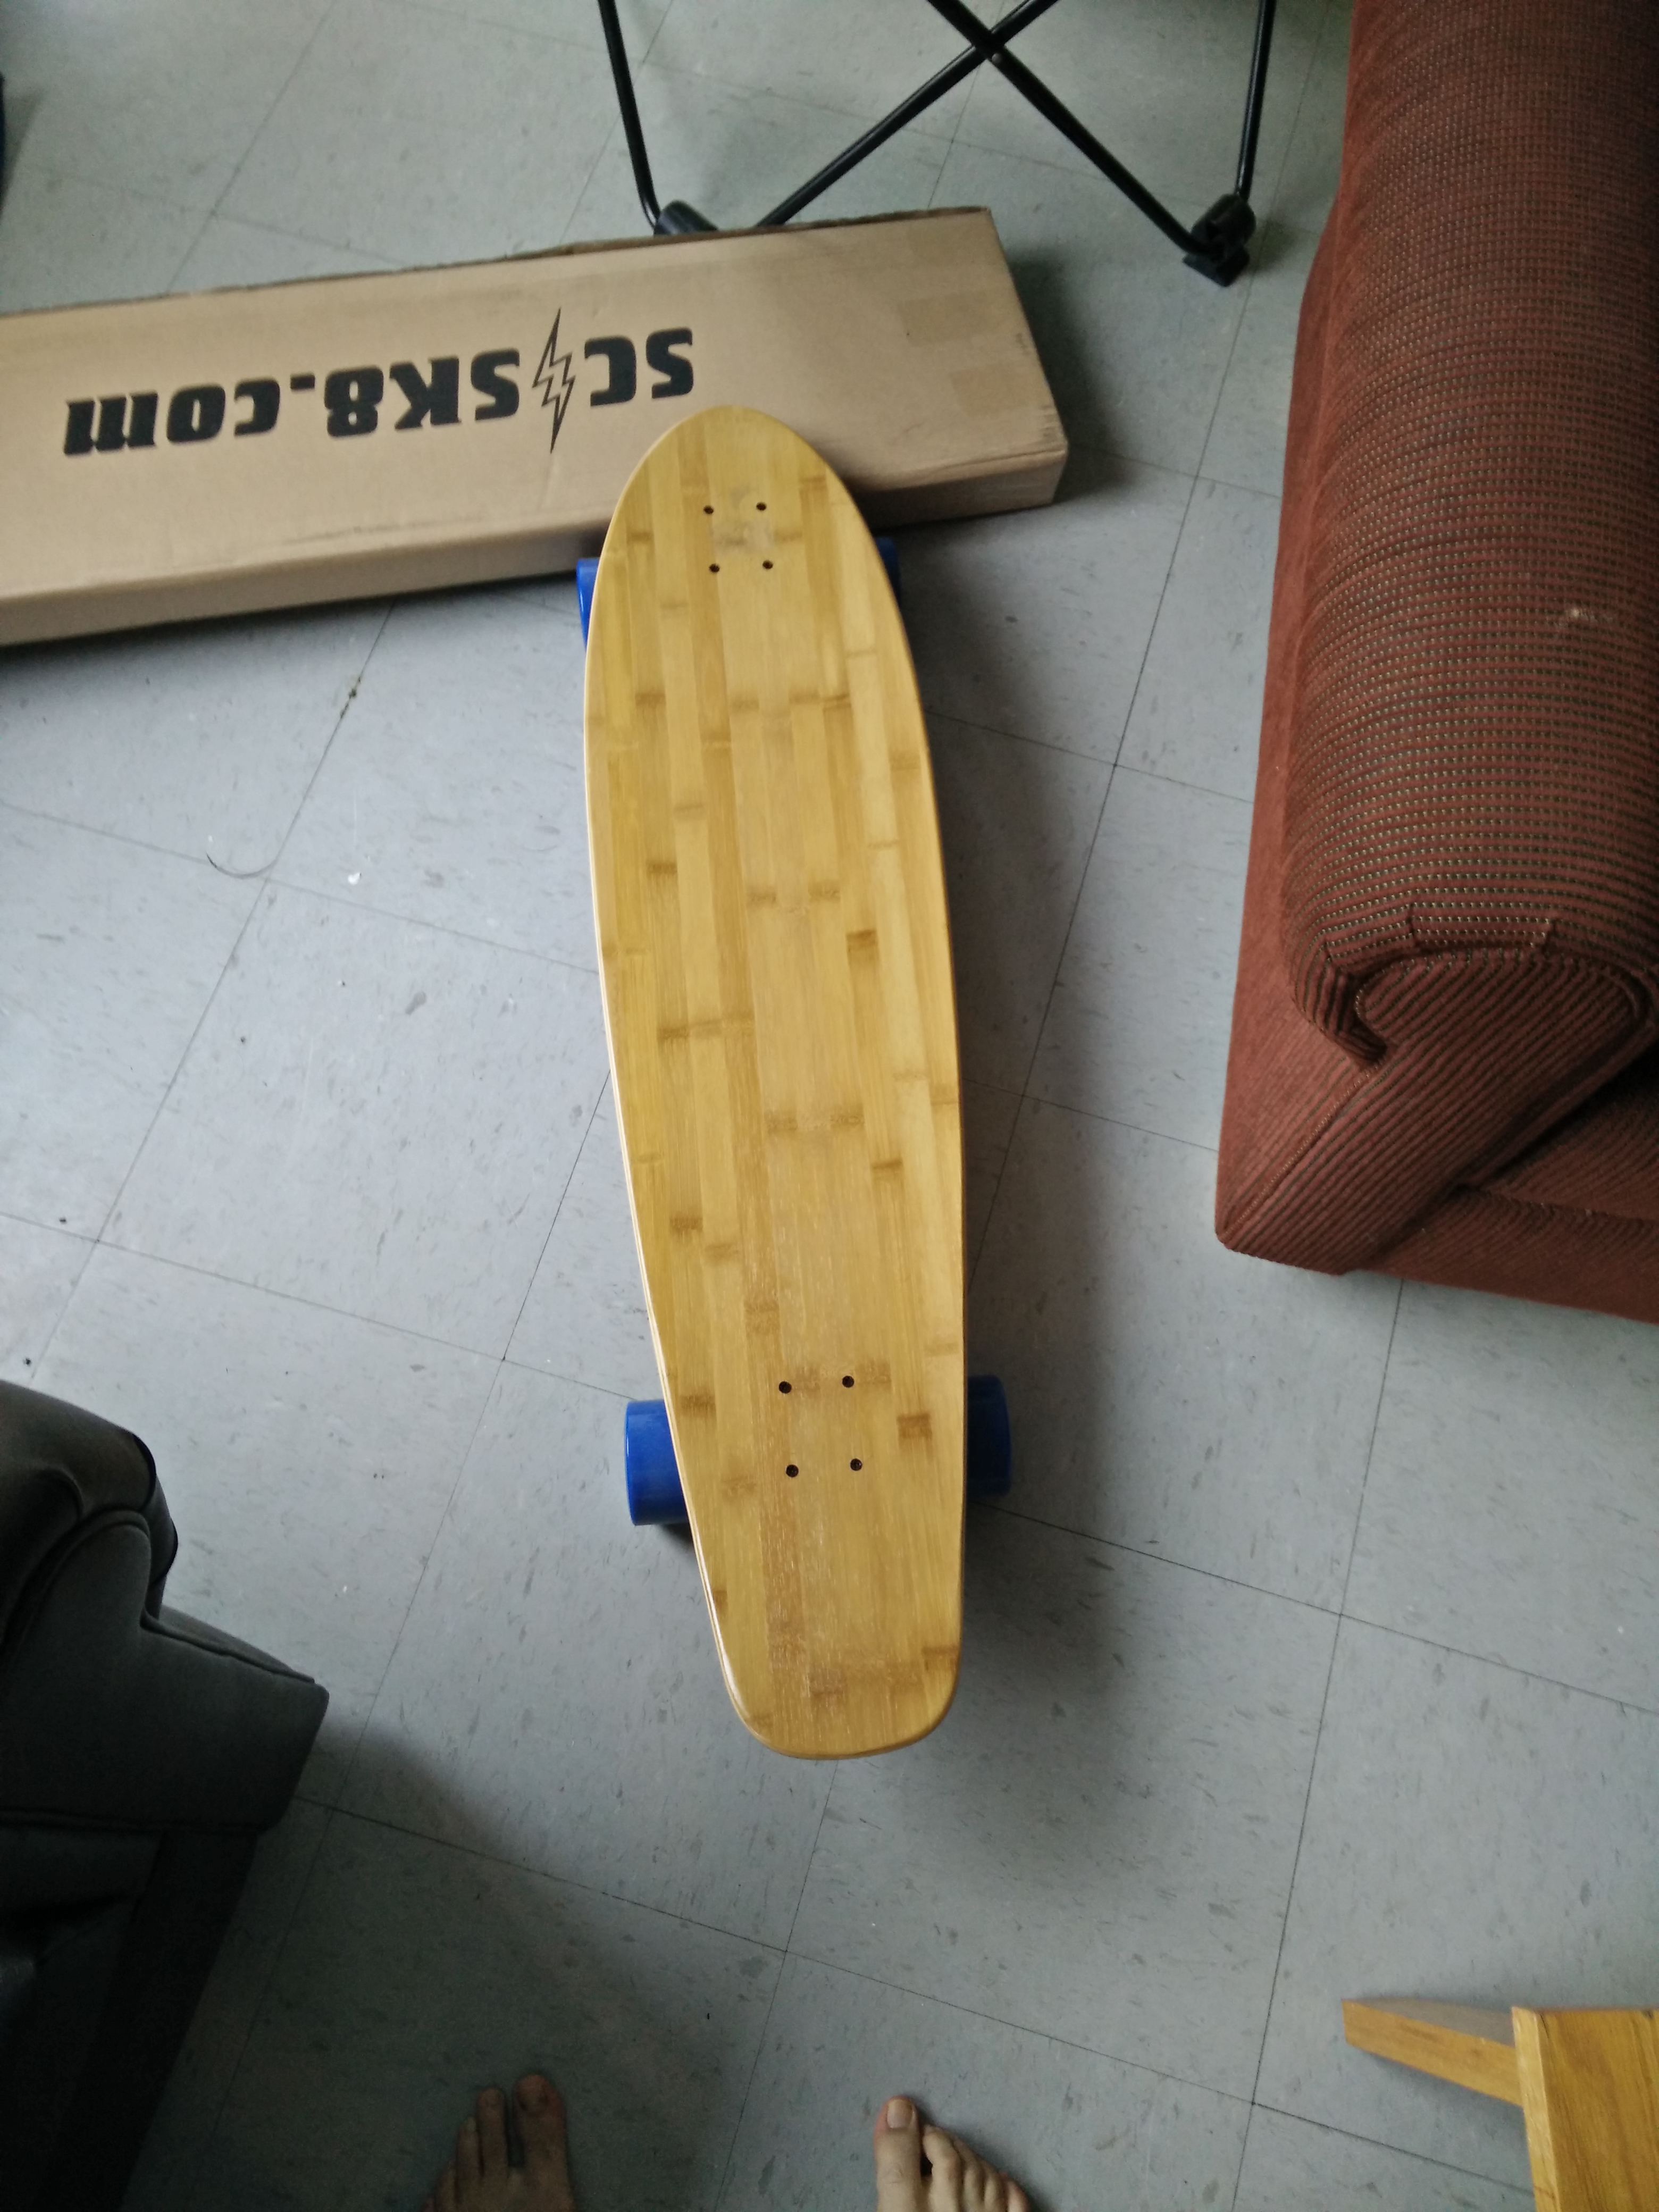 Putting it together was a breeze and super simple. This was exactly what I needed and it's a fraction of the cost of an actual longboard.
Creating the Motor Mount
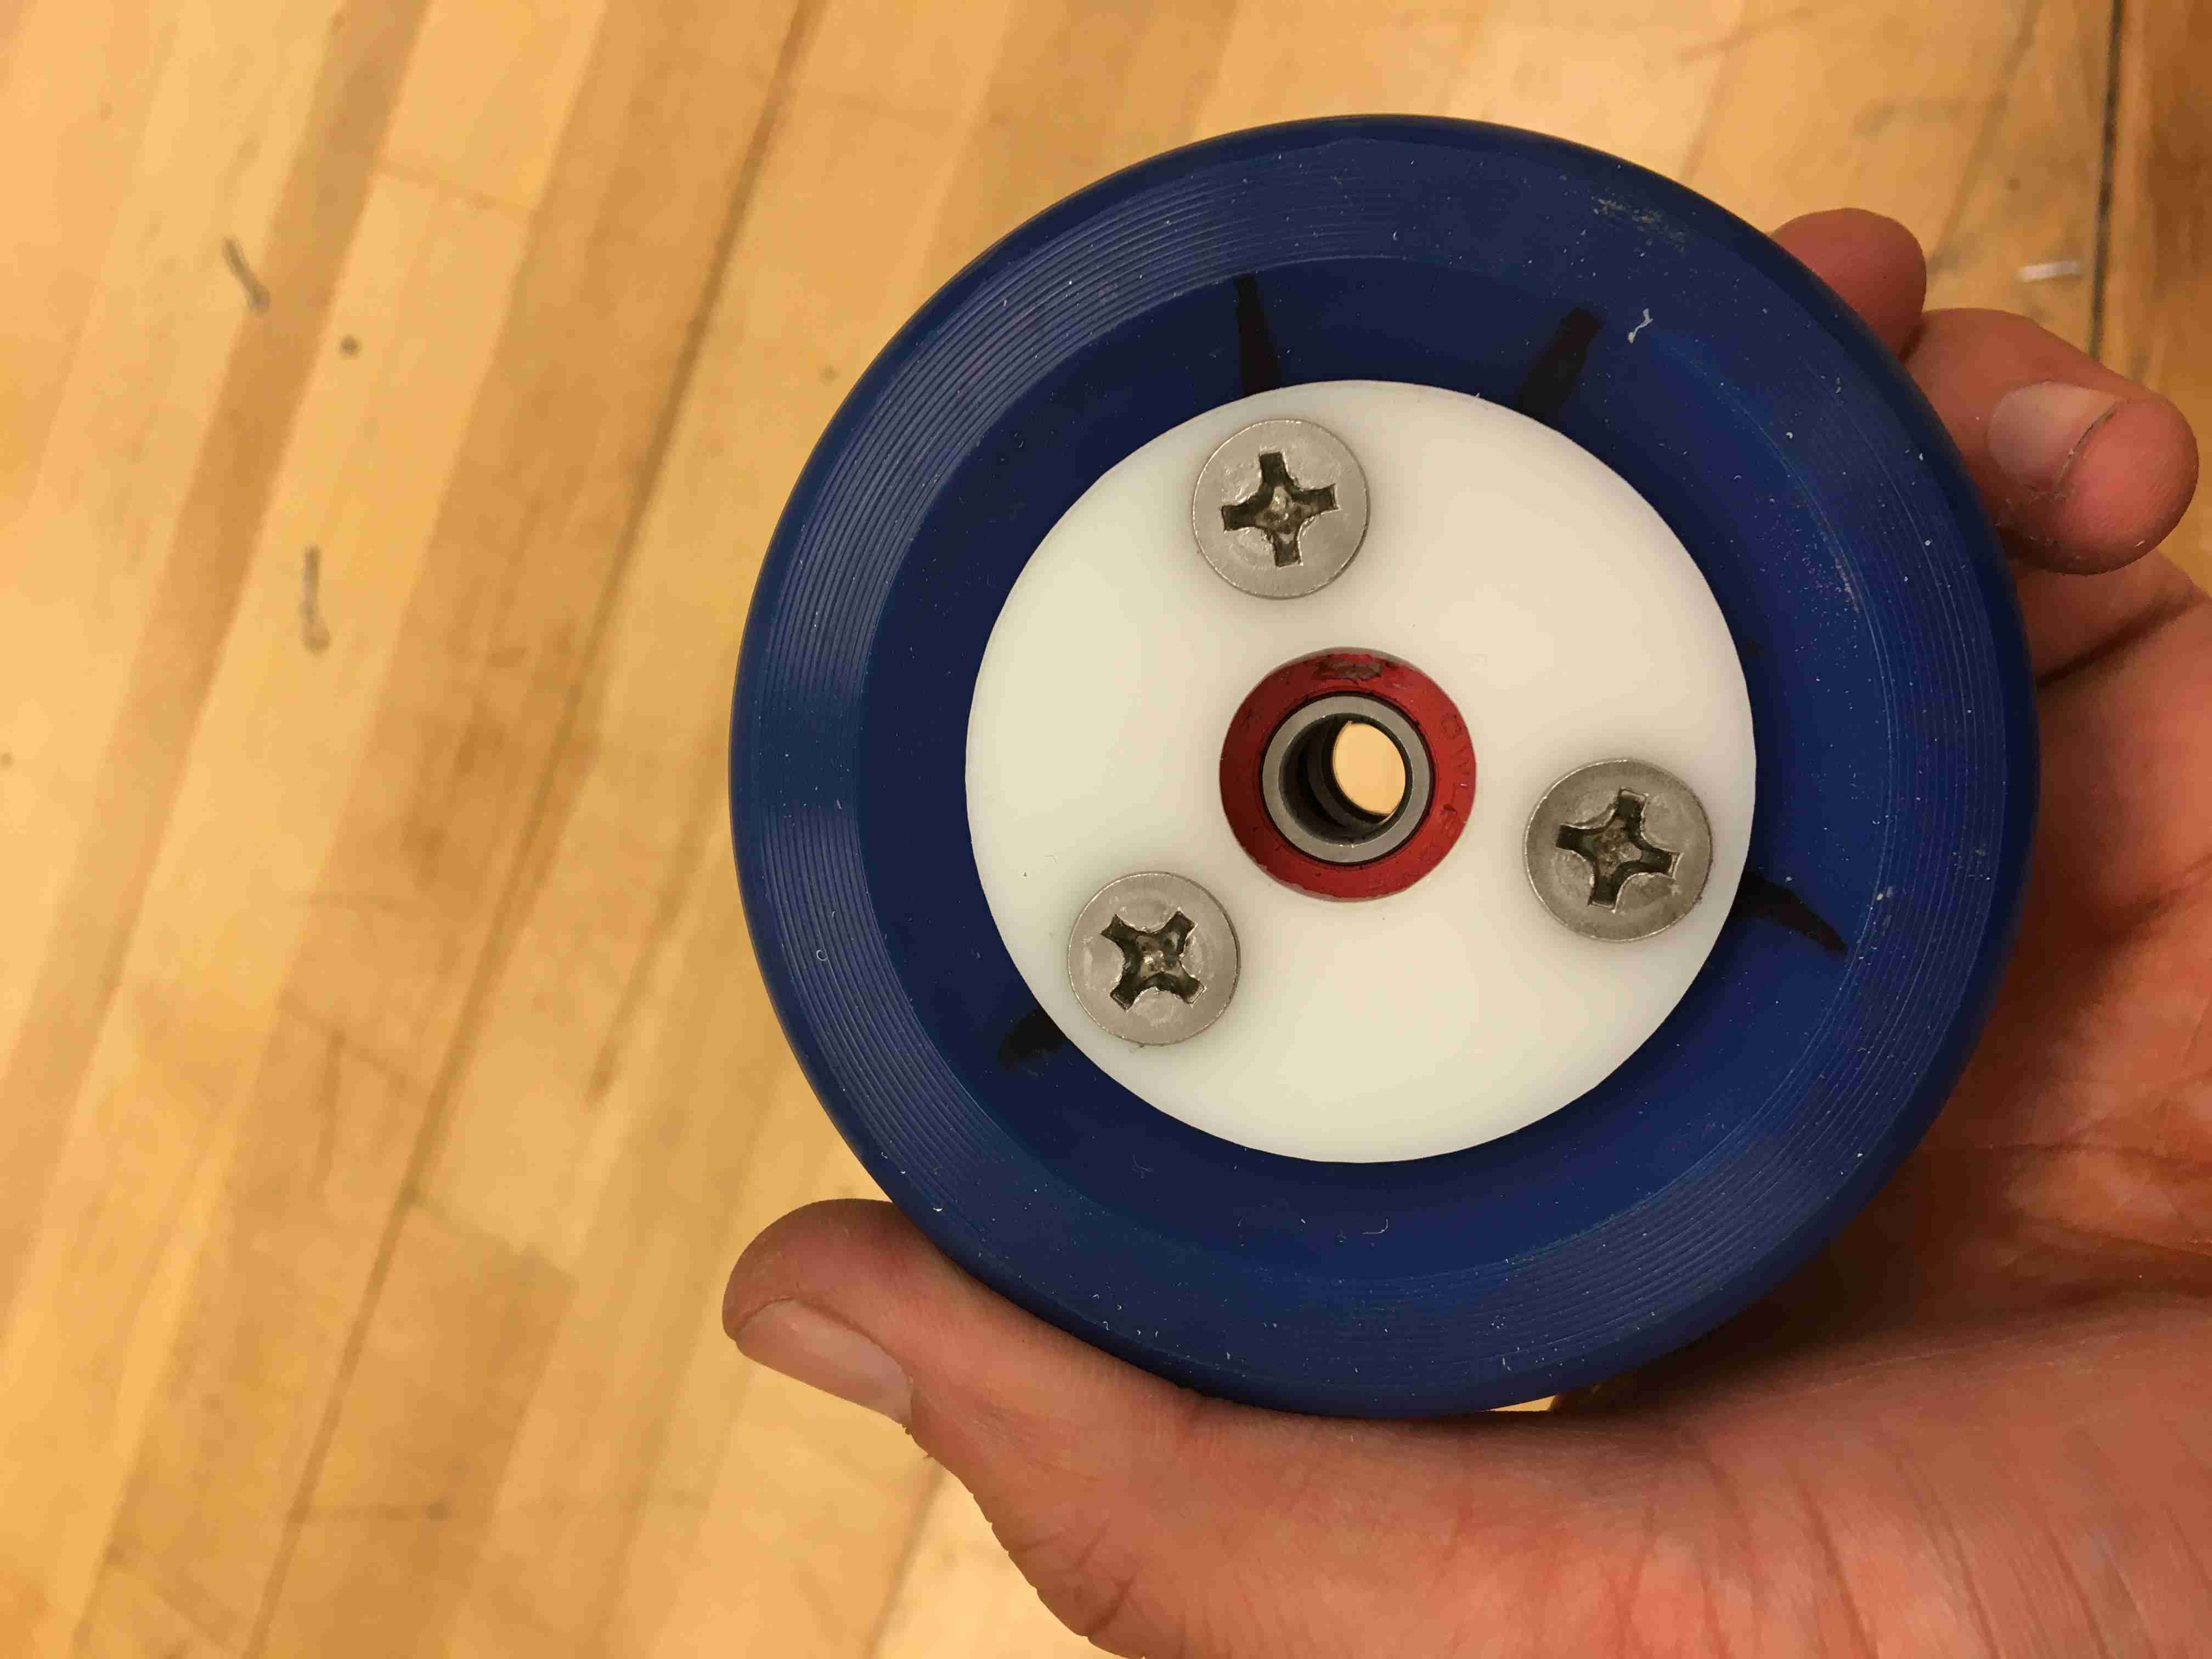
 I needed to enlarge the holes on the flywheel because I bought clones and because I didn’t have much of an idea of what I was doing. You should not need to drill holes through the flywheel clones, just use 4-6 thin screws. The reason I didn’t choose thin screws was because I didn’t have oversized screws in lab, so I had to stick with ¼-20 screws.
 I didn’t know that motor mounts define their layout by the diagonal. So if they say they have 30mm bolt holes, that means that the holes are each 30/sqrt(2) apart.
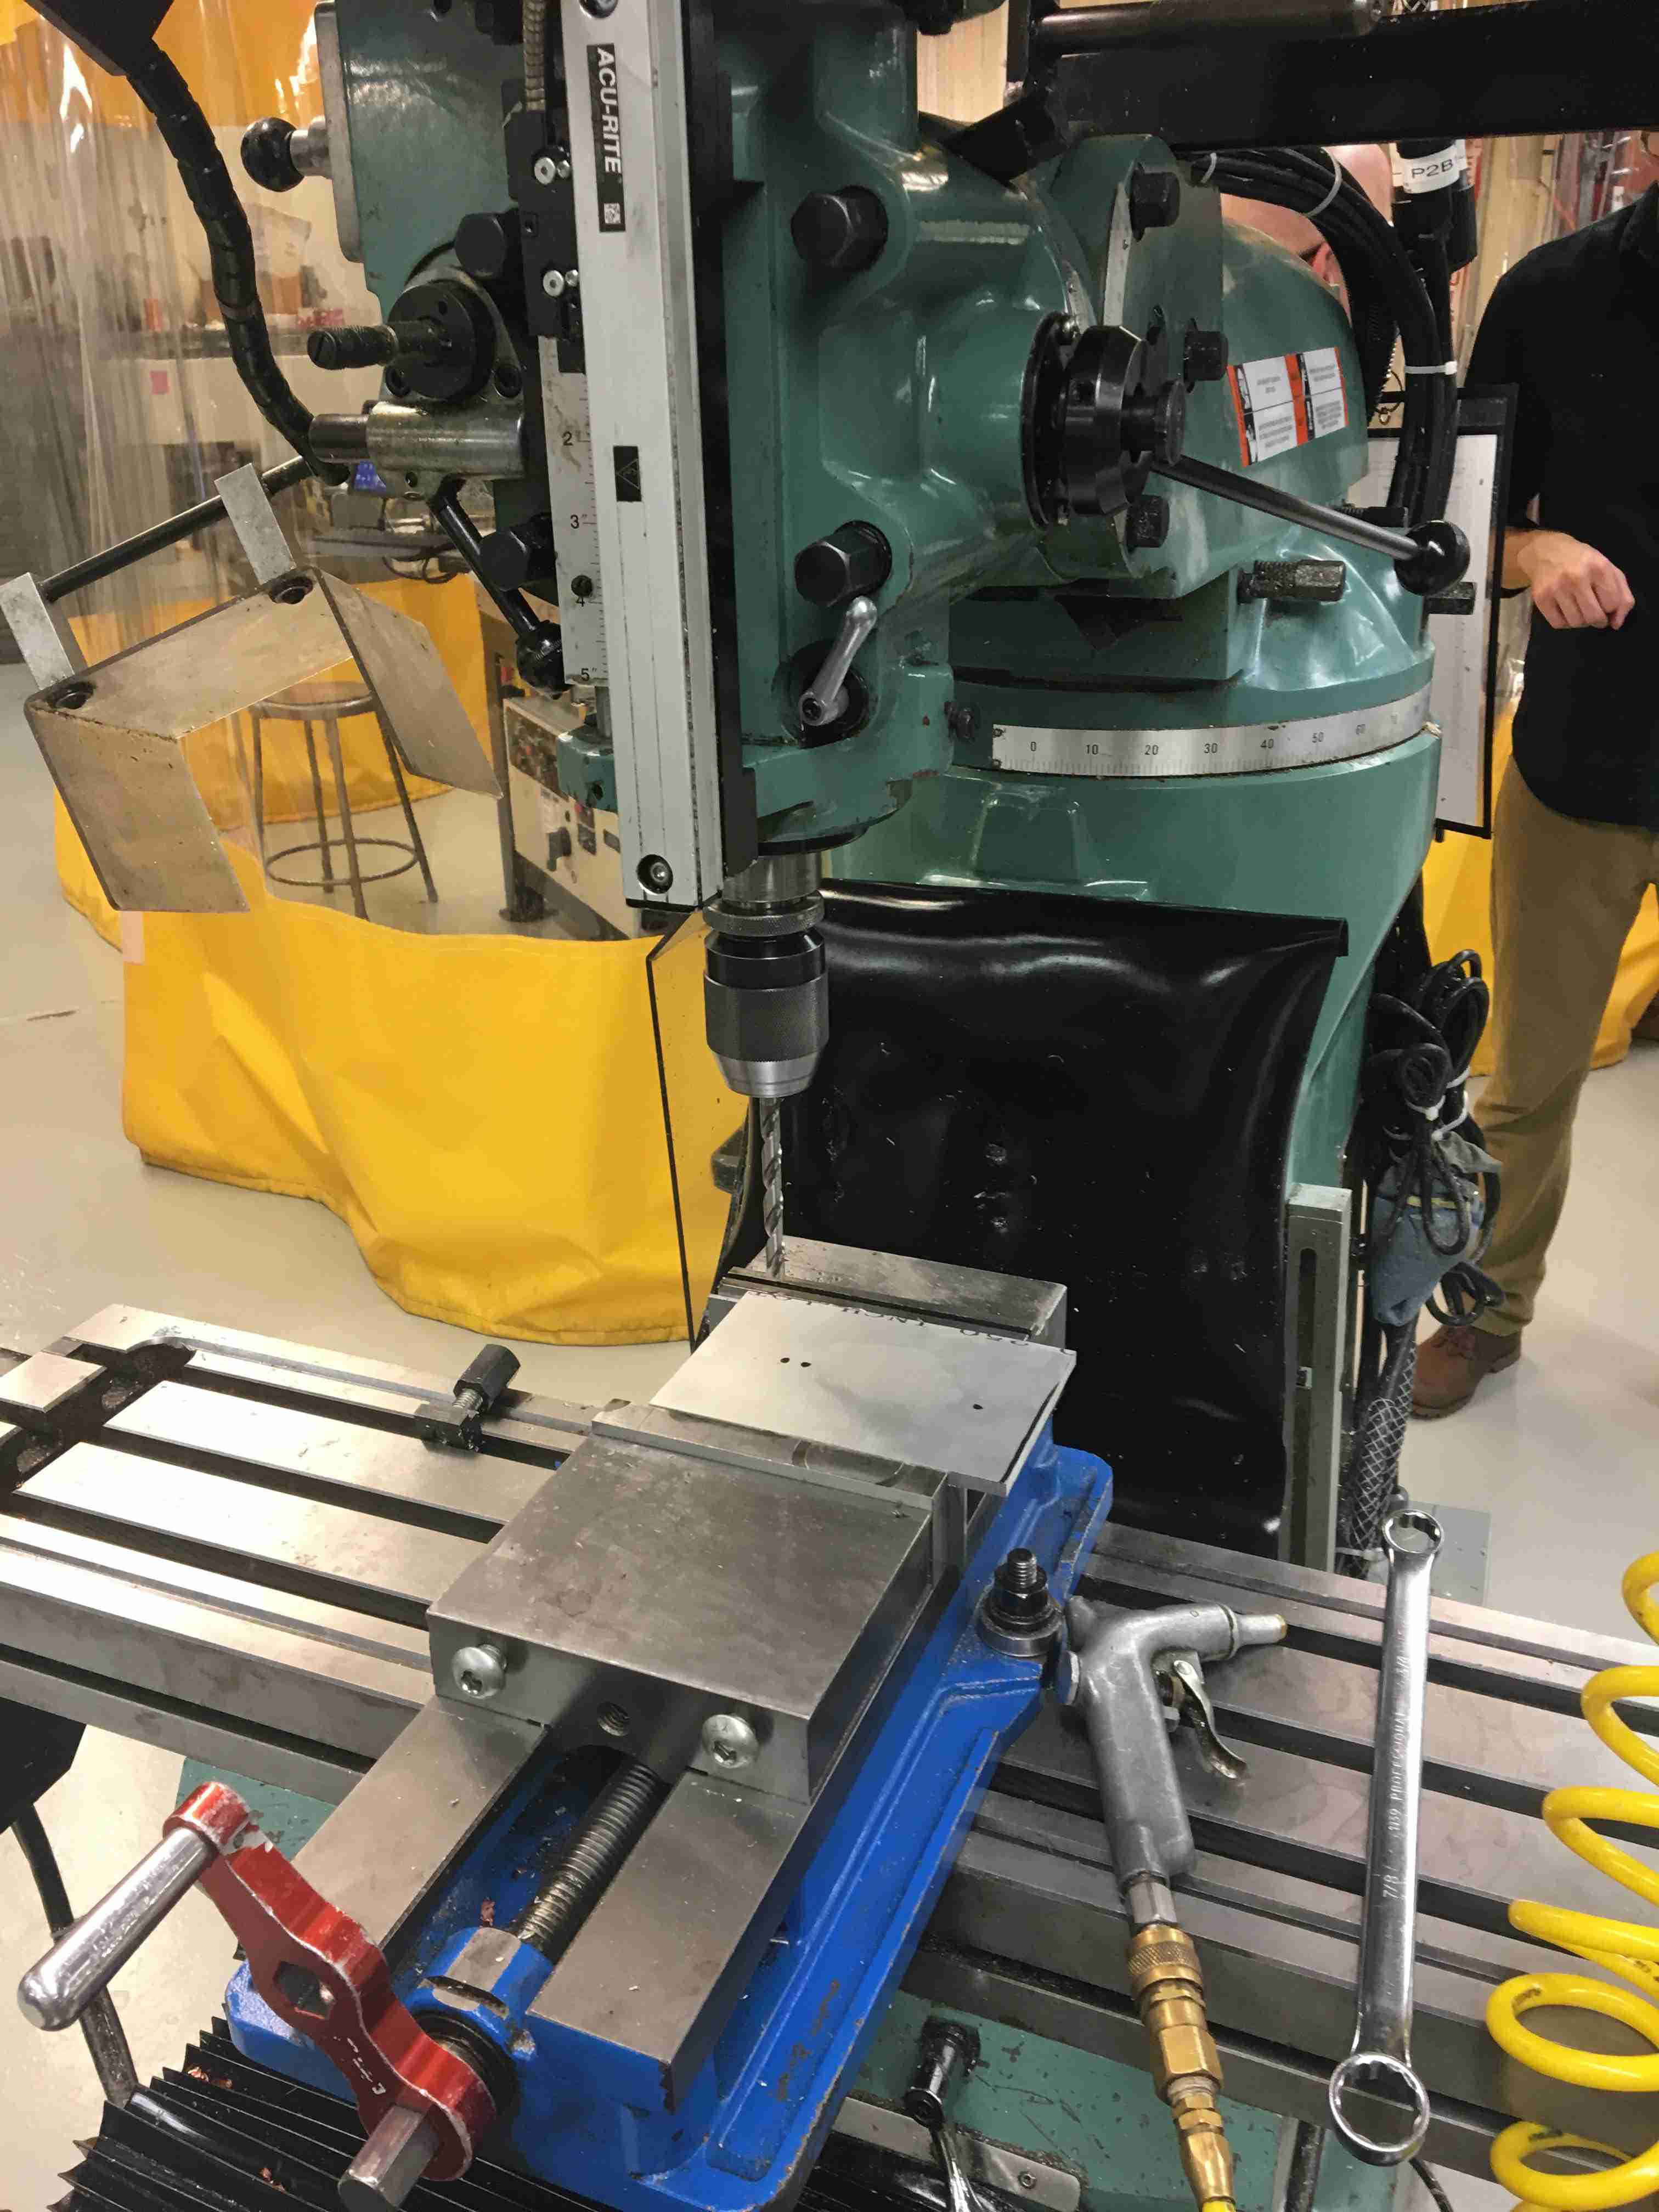 Then I actually cut the motor mount. I took a 1/4" piece of aluminum from the shop for 10 bucks and cut it.
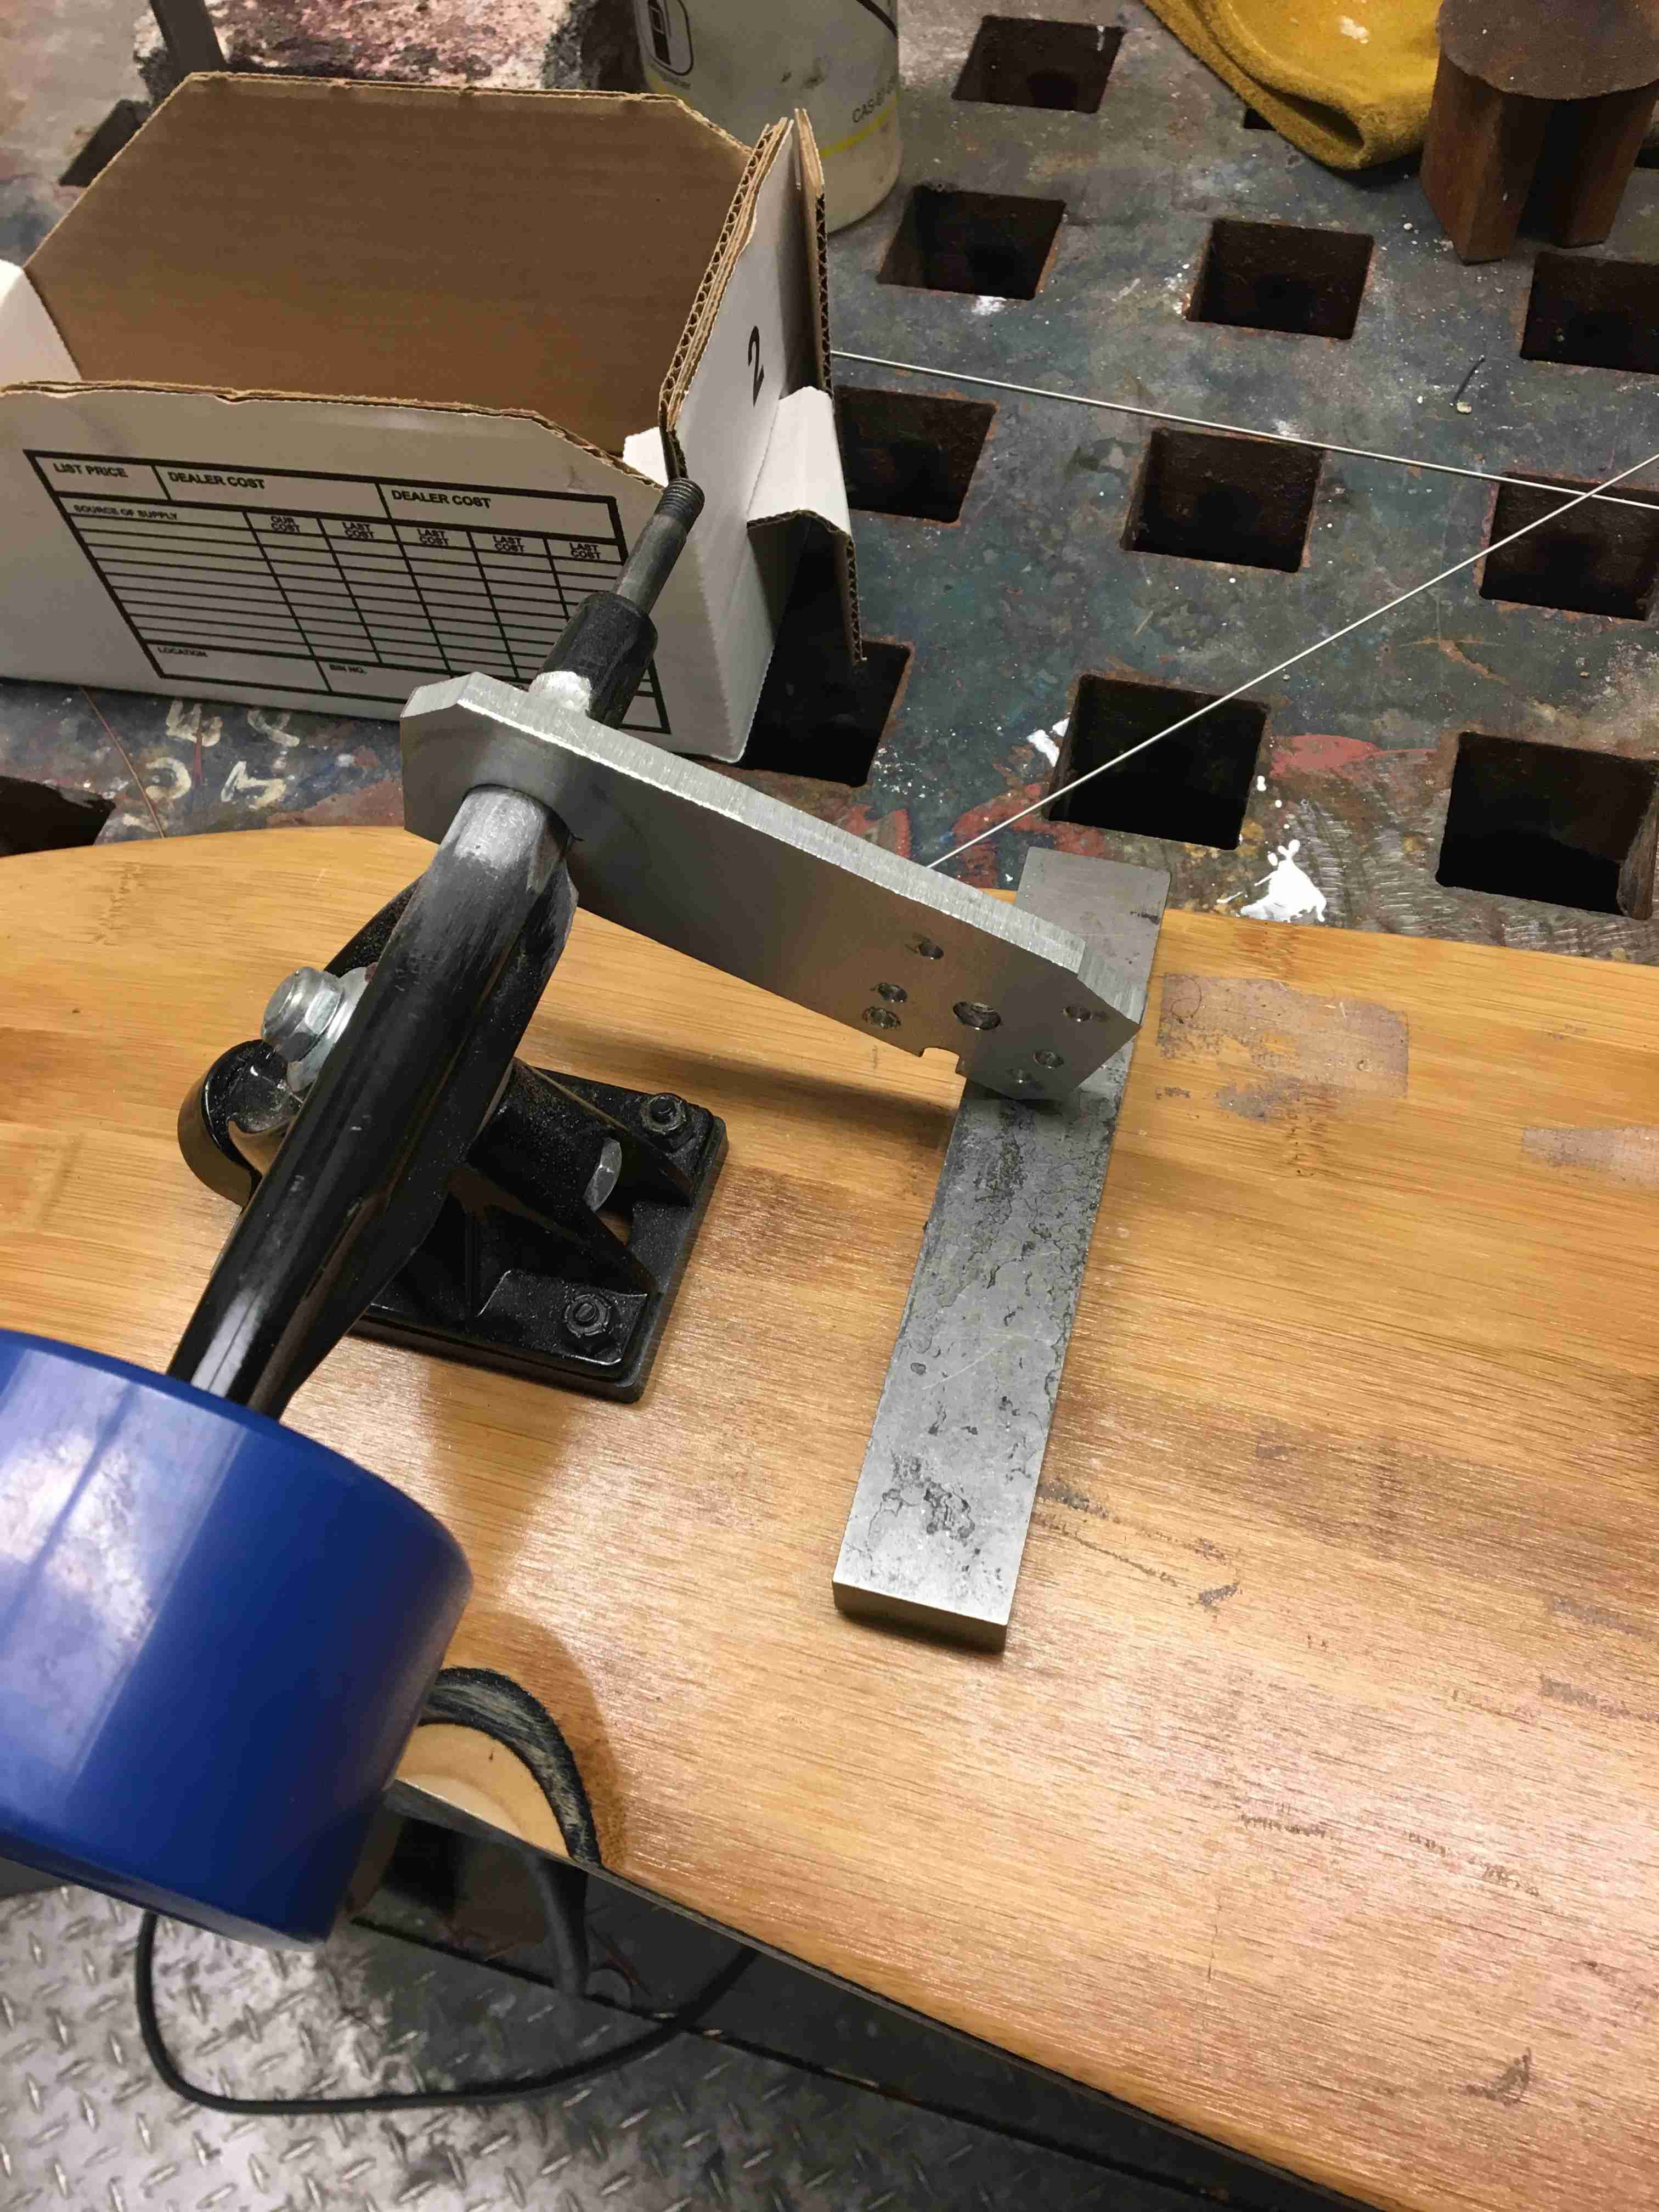
 Testing the center to center distance. Looked stable when I pulled it, but even a change of a couple millimeters can change tension by a lot.
In the next iteration, I cut more aluminum so I could add some tolerance to the center to center distance. Definitely necessary, even if you have the
calculated center to center distance.
Testing the center to center distance. Looked stable when I pulled it, but even a change of a couple millimeters can change tension by a lot.
In the next iteration, I cut more aluminum so I could add some tolerance to the center to center distance. Definitely necessary, even if you have the
calculated center to center distance.
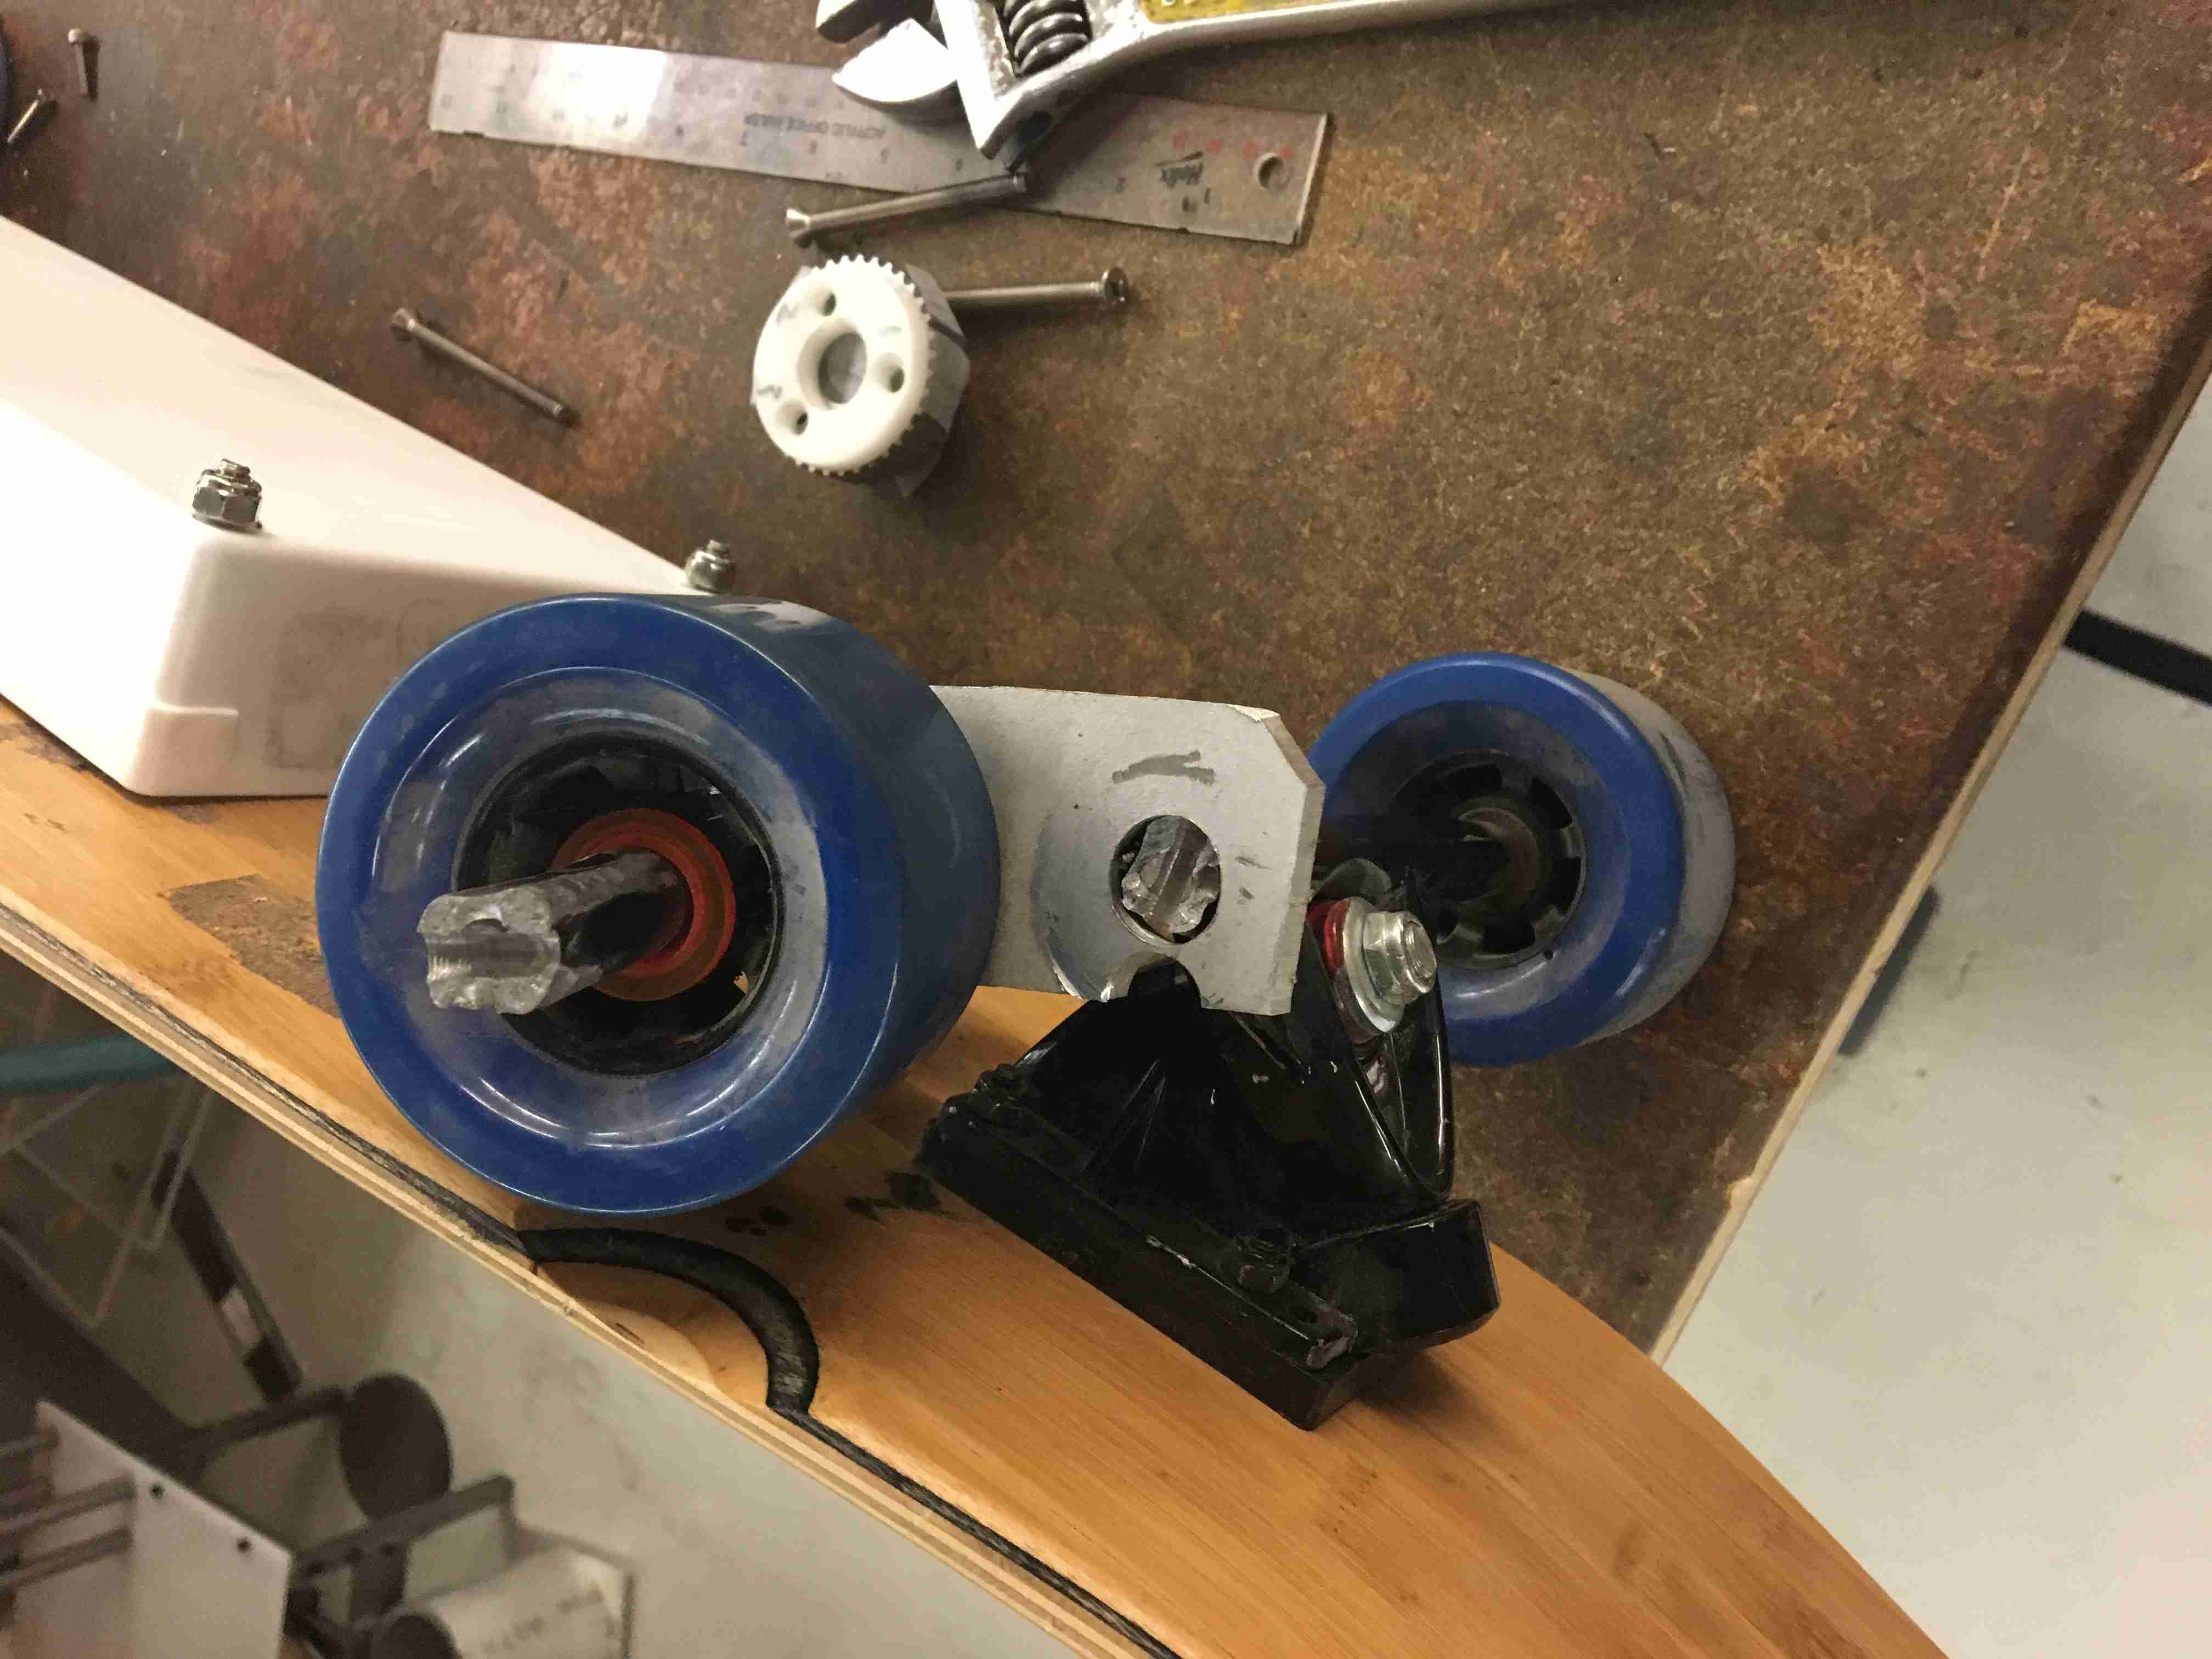
Here you can see what it looks like when you have too loose of a center to center distance. The belt, while moving, doesn’t actually work too well. This was also the first iteration of the motor mount, but I didn't do everything to the right calculations. It was mostly just poor planning.
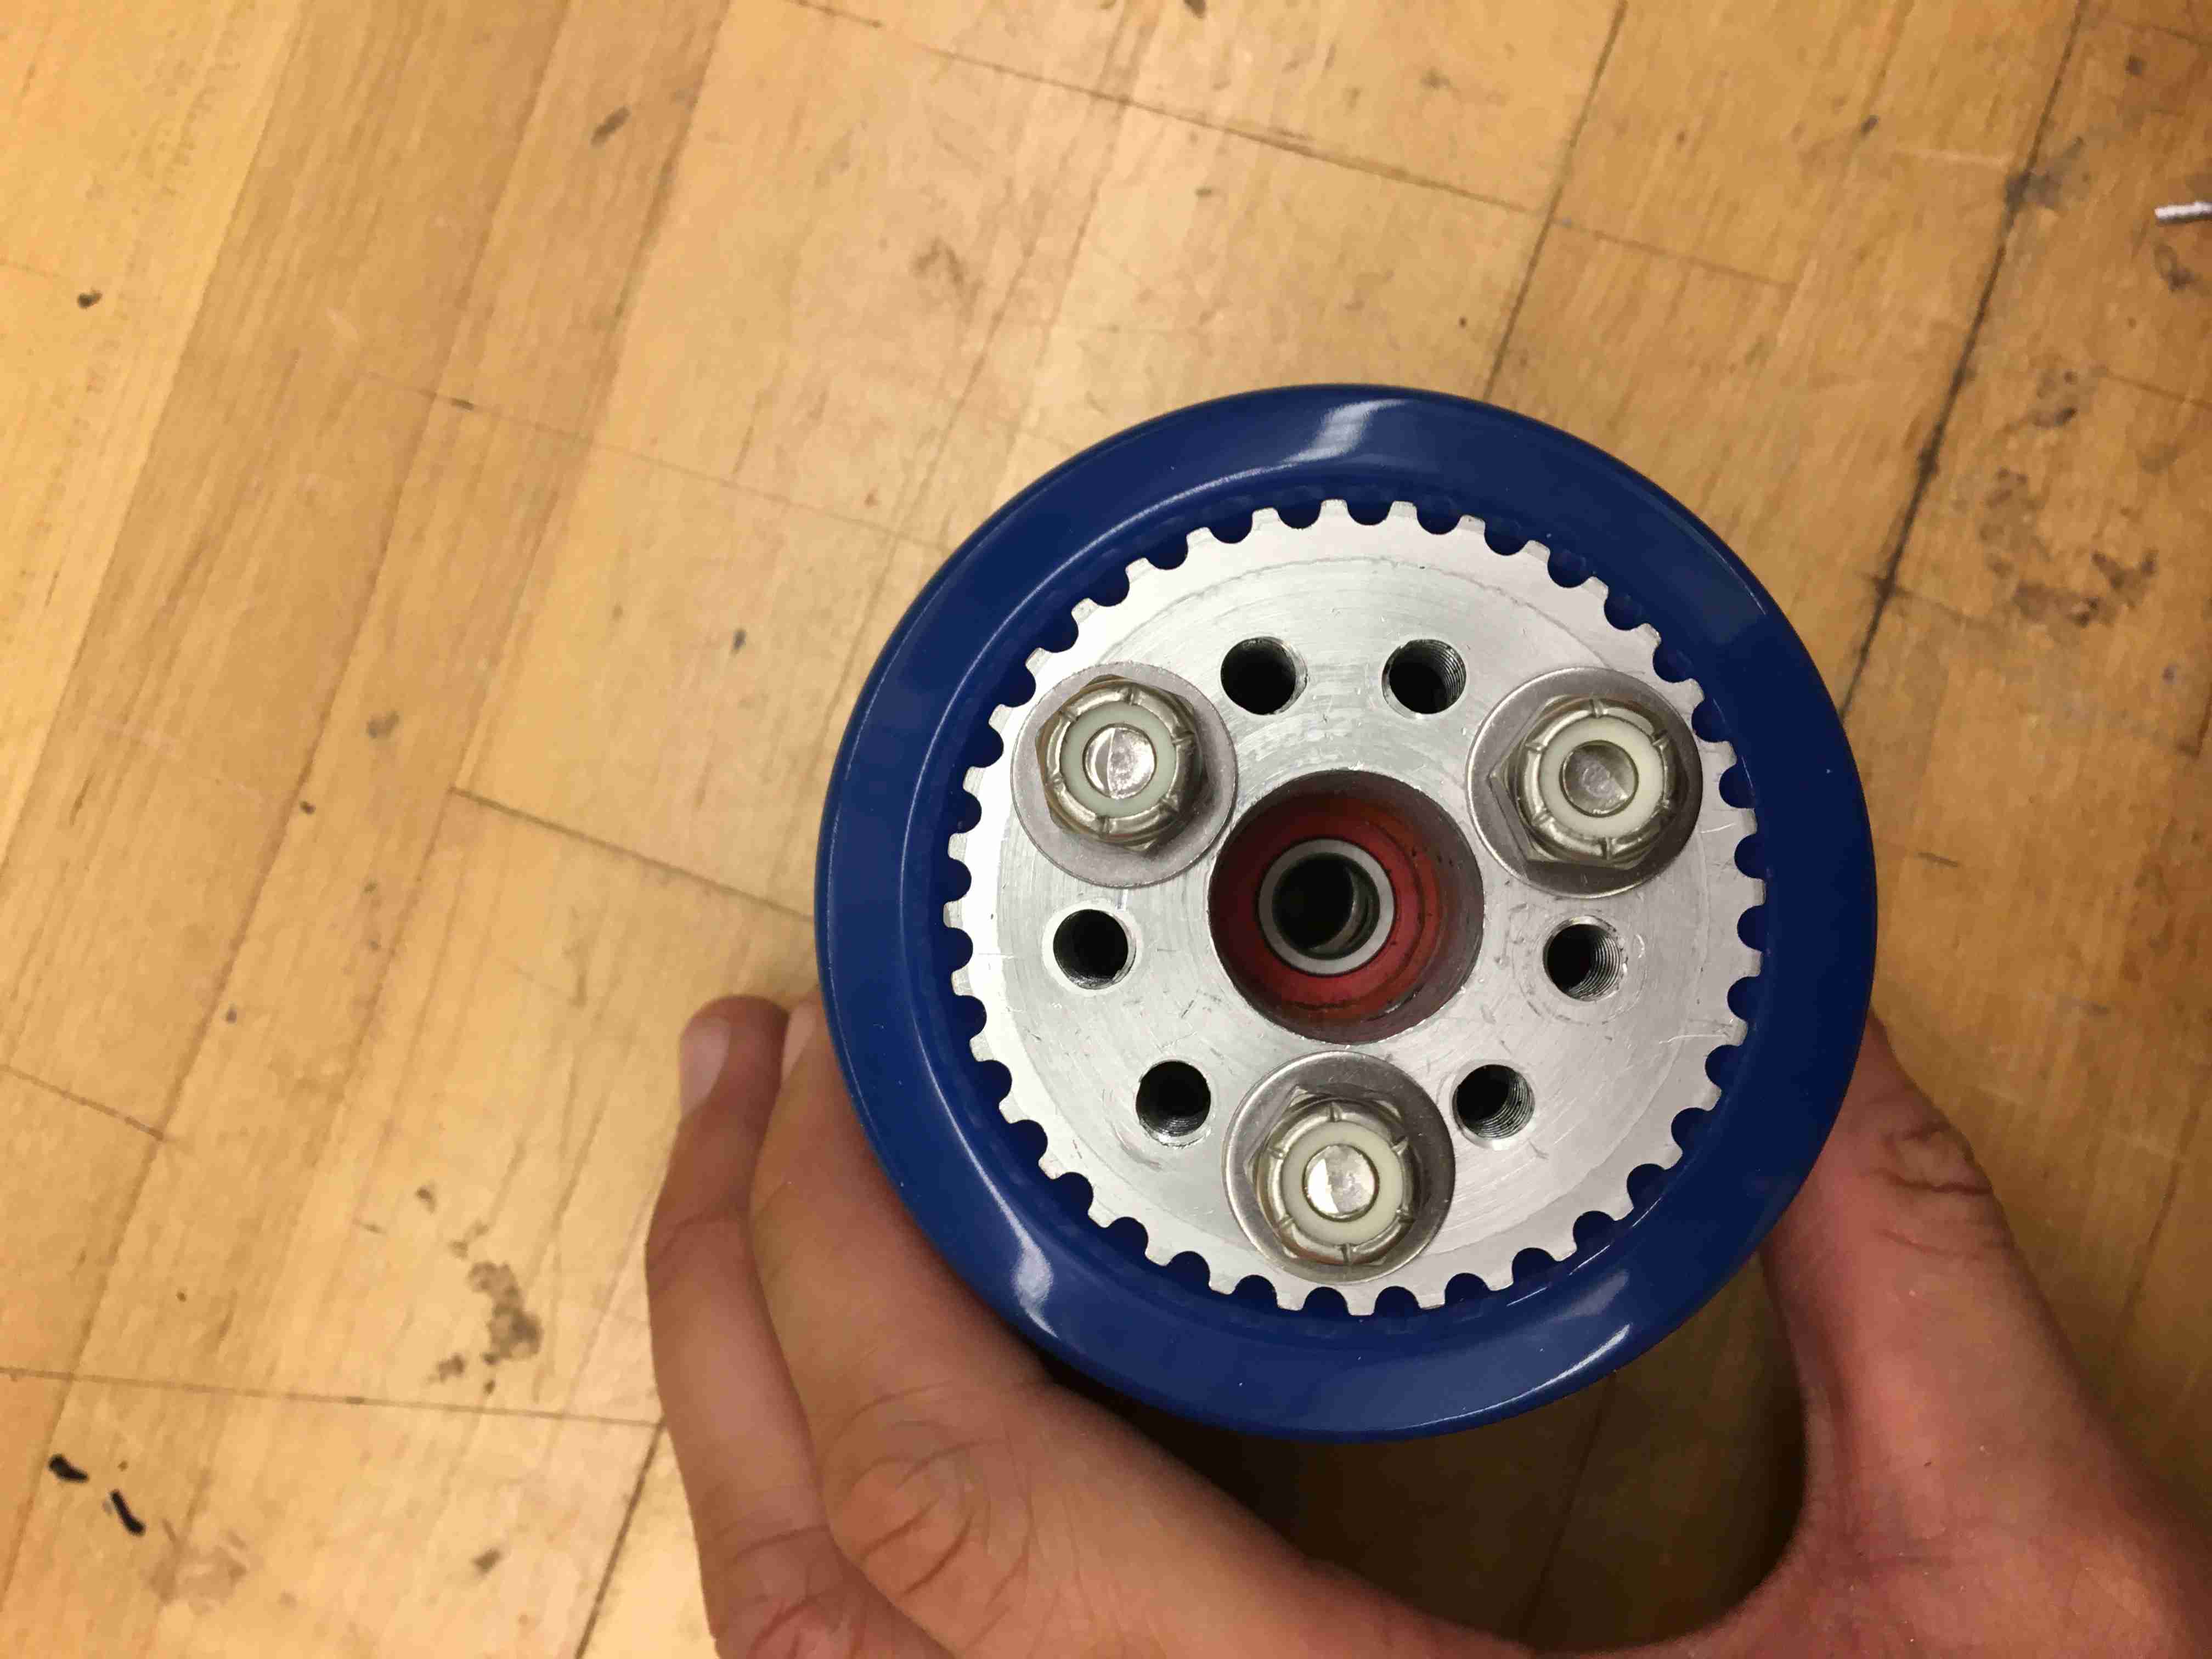
Attaching the pulley to the wheel
 Countersinked the holes on a washer such that the screws would snugly fit.
 The other side. Was lucky enough to get exactly the depth I needed.
I used blue locktite to hold it in place, which was more than enough. Do not use red locktite, as you won’t have any way of removing it after you’re done.
Blue locktite is good enough to hold you, and you can use an impact wrench if you really need to undo it (which I needed to do later)
The other side. Was lucky enough to get exactly the depth I needed.
I used blue locktite to hold it in place, which was more than enough. Do not use red locktite, as you won’t have any way of removing it after you’re done.
Blue locktite is good enough to hold you, and you can use an impact wrench if you really need to undo it (which I needed to do later)
Welding
 I didn’t really know how to weld, so I had to learn rather quickly. Those black spots are training hits.
Basic rules for MIG welding are simple: stay close to the point of contact, or otherwise the tungsten won’t affect the weld and you’ll have gross black welds instead of the shiny metallic ones.
Also, move the welder back and forth slowly and controlled.
I didn’t really know how to weld, so I had to learn rather quickly. Those black spots are training hits.
Basic rules for MIG welding are simple: stay close to the point of contact, or otherwise the tungsten won’t affect the weld and you’ll have gross black welds instead of the shiny metallic ones.
Also, move the welder back and forth slowly and controlled.
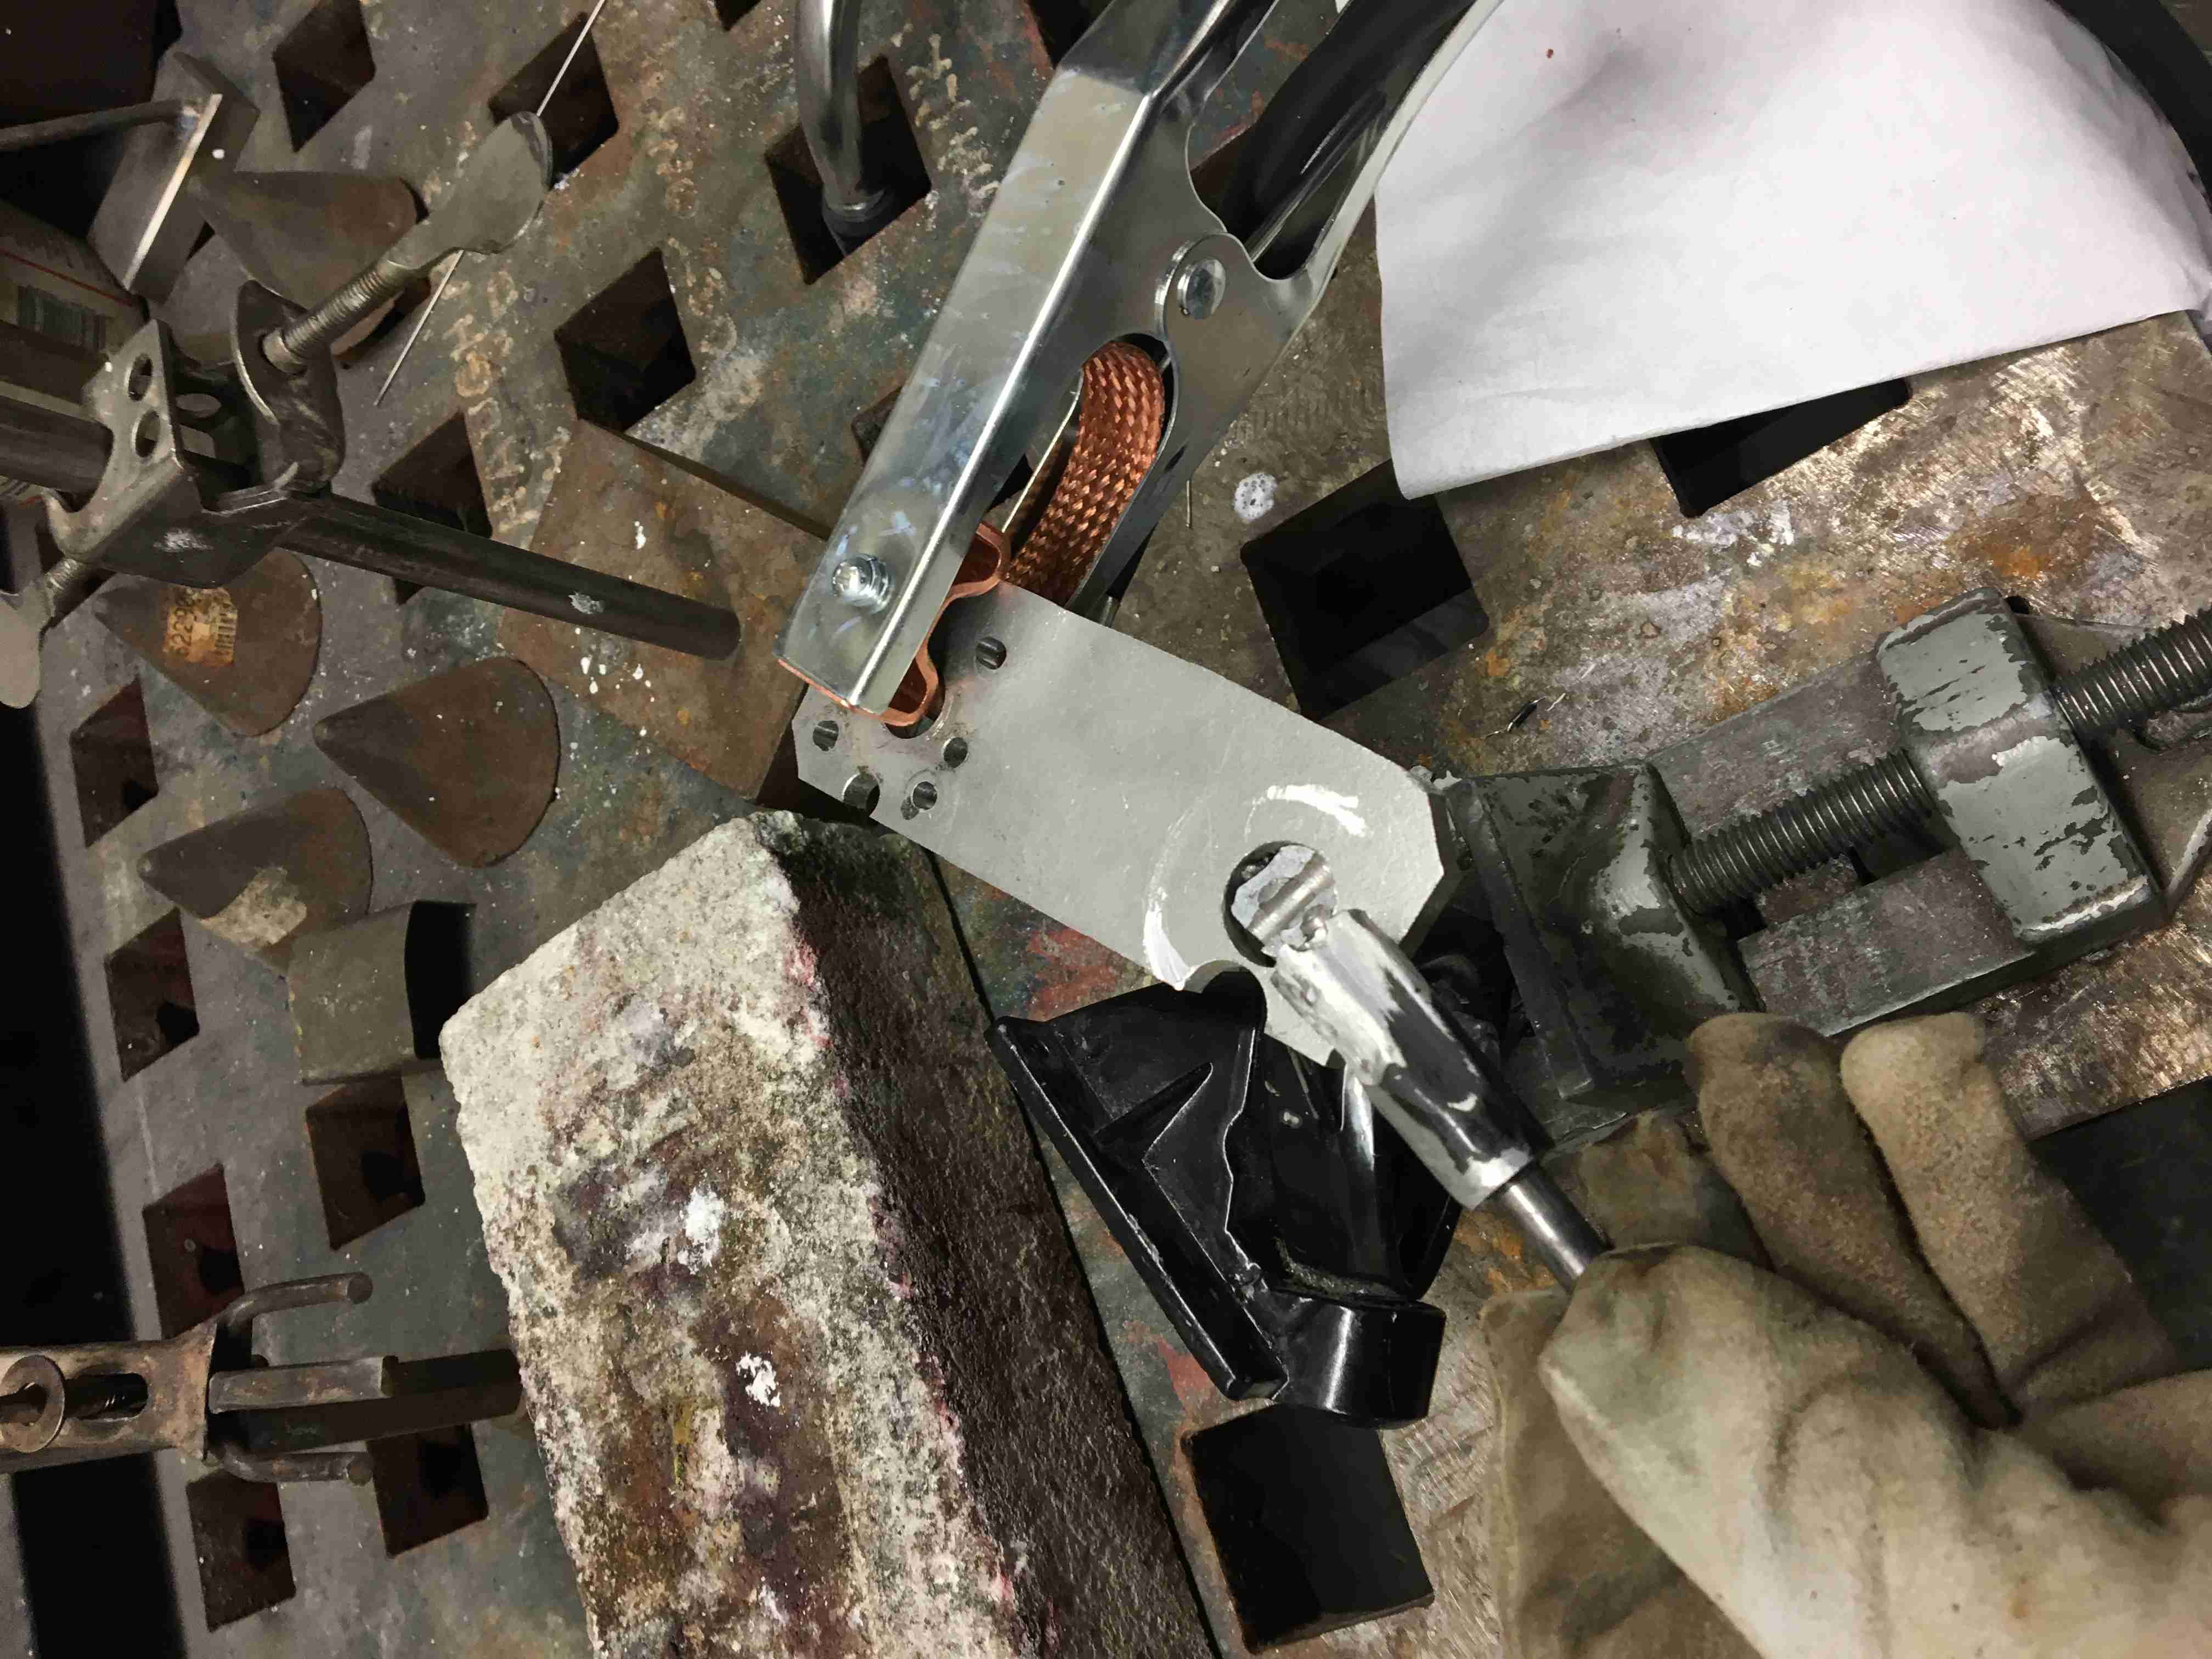
 I had to sand away the paint (you can see the aluminum) and then raised the platform up slightly with a metallic bar. The weld was only on one side, as doing it to the side closest to the wheel would only create a clearance problem.
 Due to the earlier problem of drilling through the wheel, I lost a lot of structural material, which broke the piece after a couple runs.
 I just rewelded it again, using the same setup as before. I had to file everything down a little so it would run fine. Not sure how well it’ll hold, but hopefully well enough.
Circuitry Again
Let's go back to the circuitry for a sec. If you don't use the anti-spark plug, you'll leave the ESC plugging in all the time,
which takes 100-120ma idly. That'll kill your battery real fast. When you connect the BMS, make sure you plug in the B- part first,
then the balance chargers, and then the P-. If you don't do this, you risk damaging the parts . We have a button that tests the battery level.
Trust me, you want this button or else the entire thing just goes nuts.
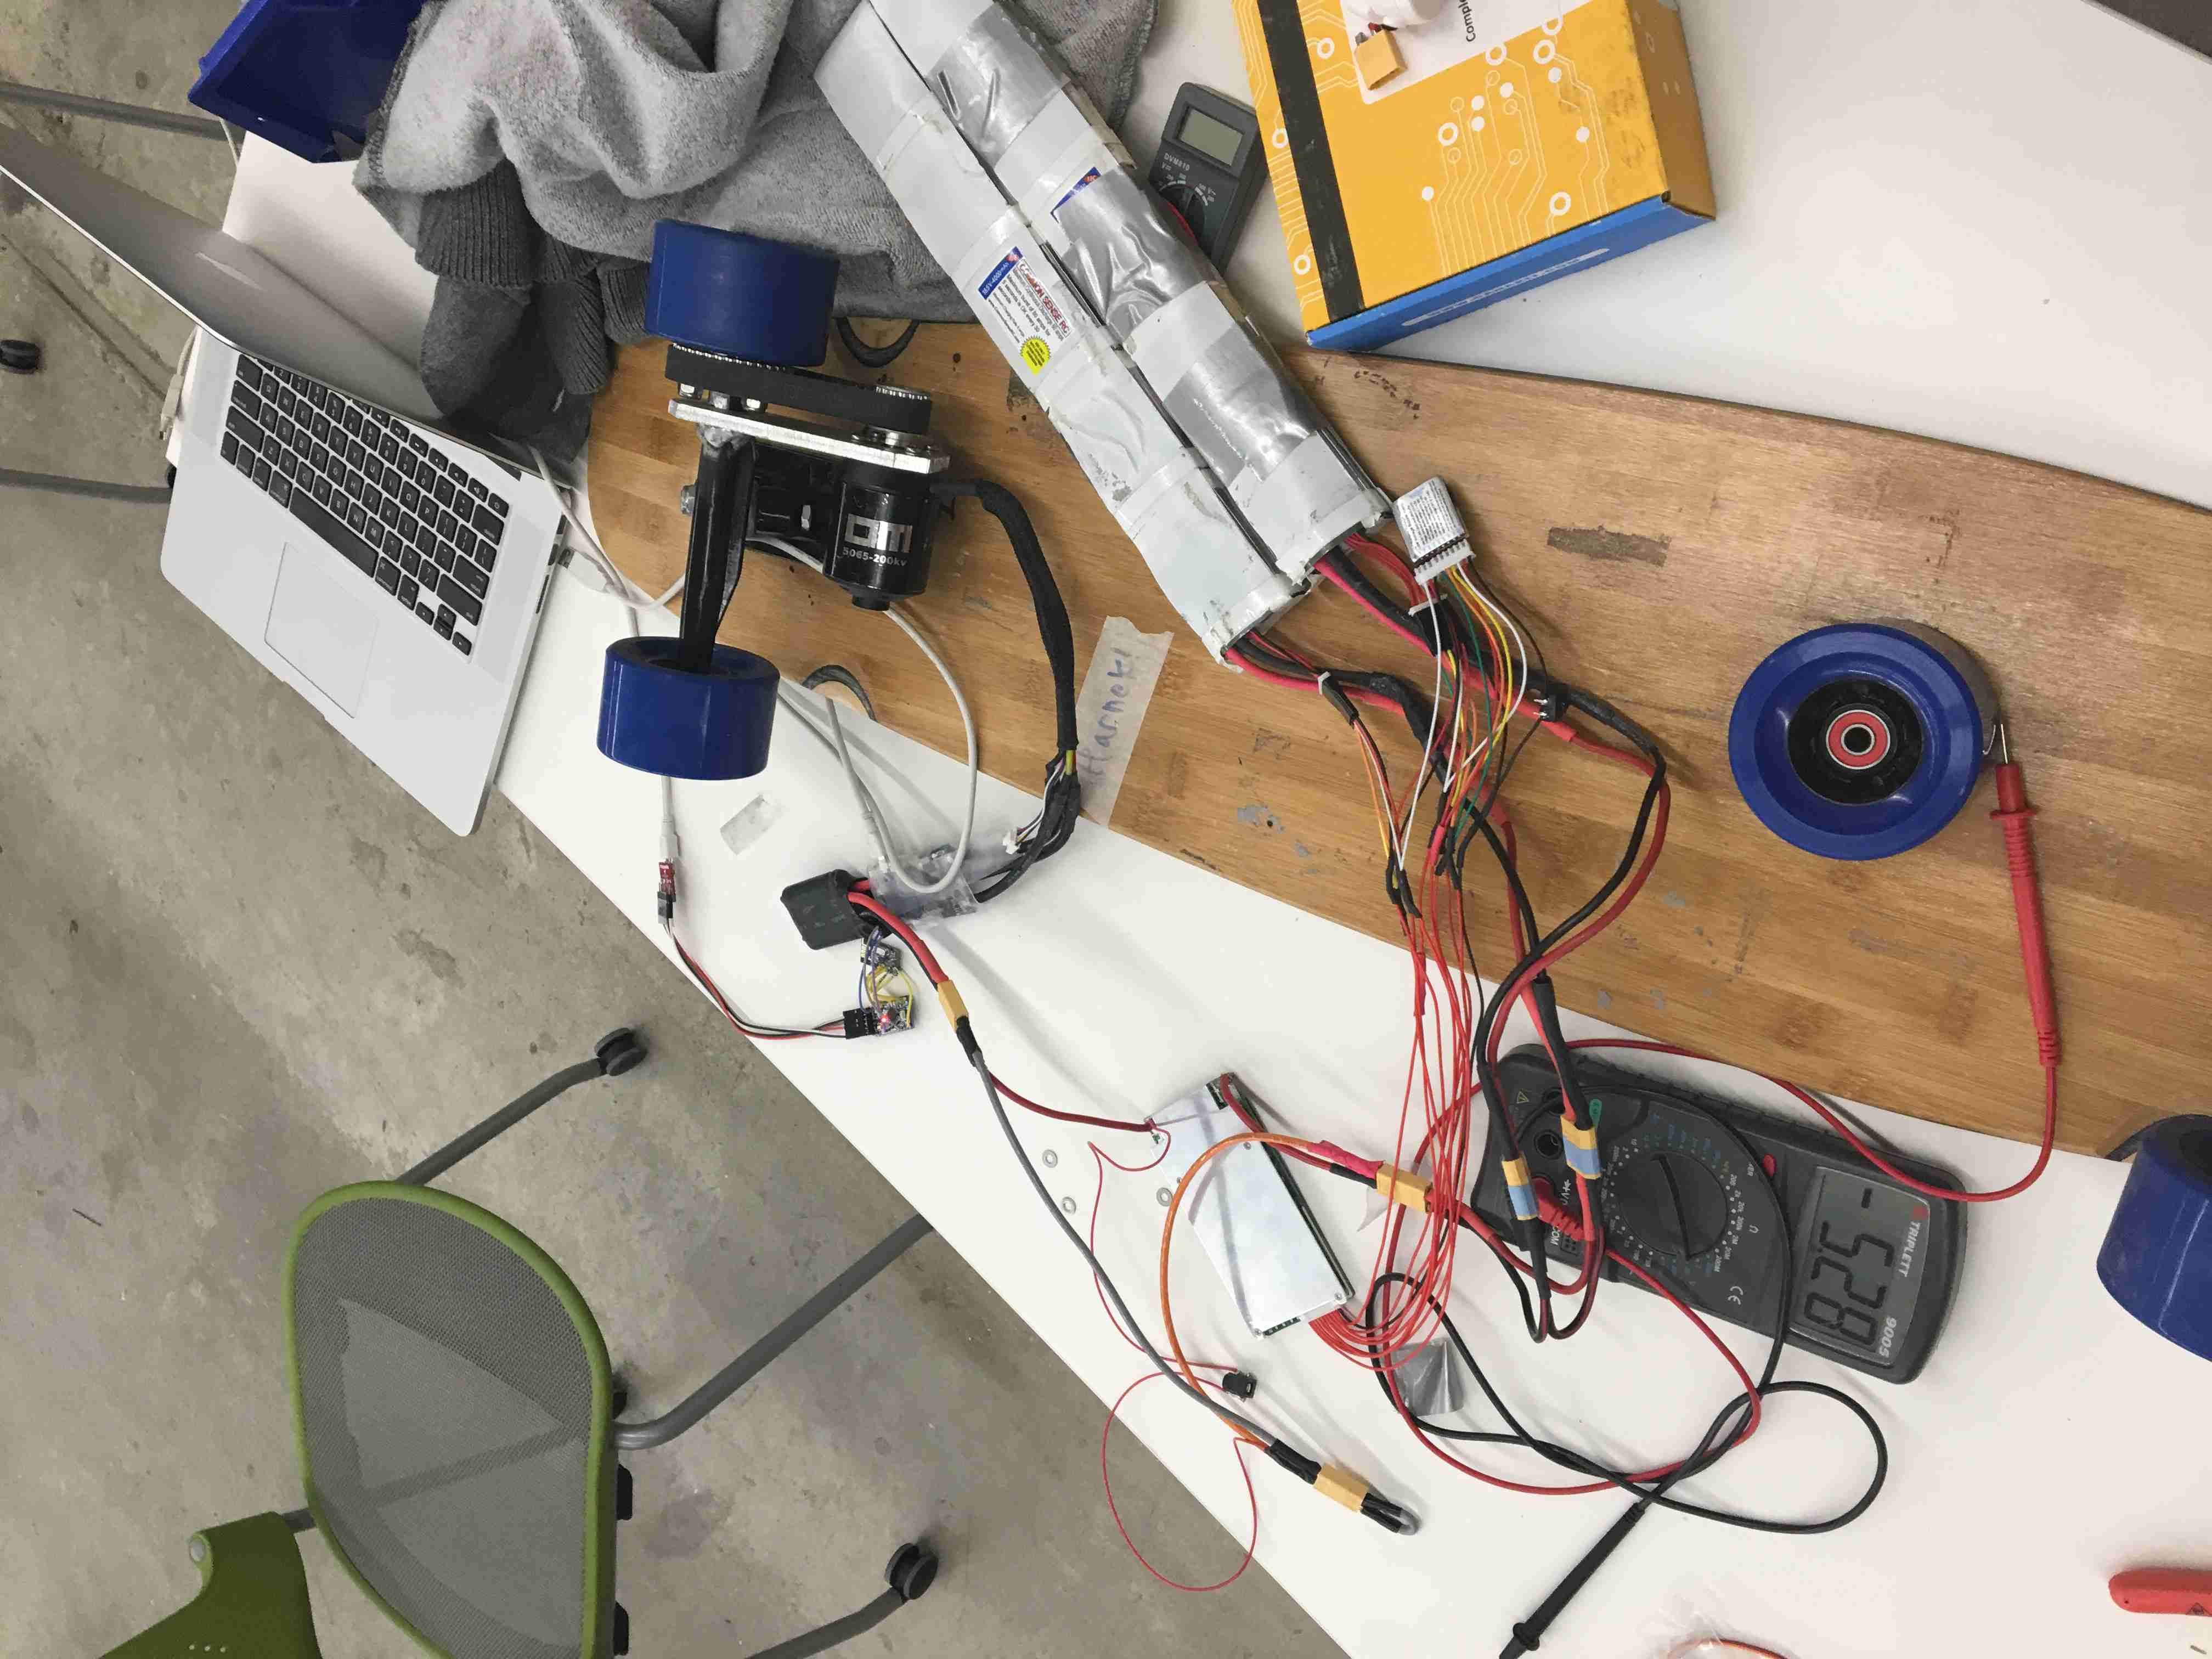 Just some simple testing!
Final Assembly
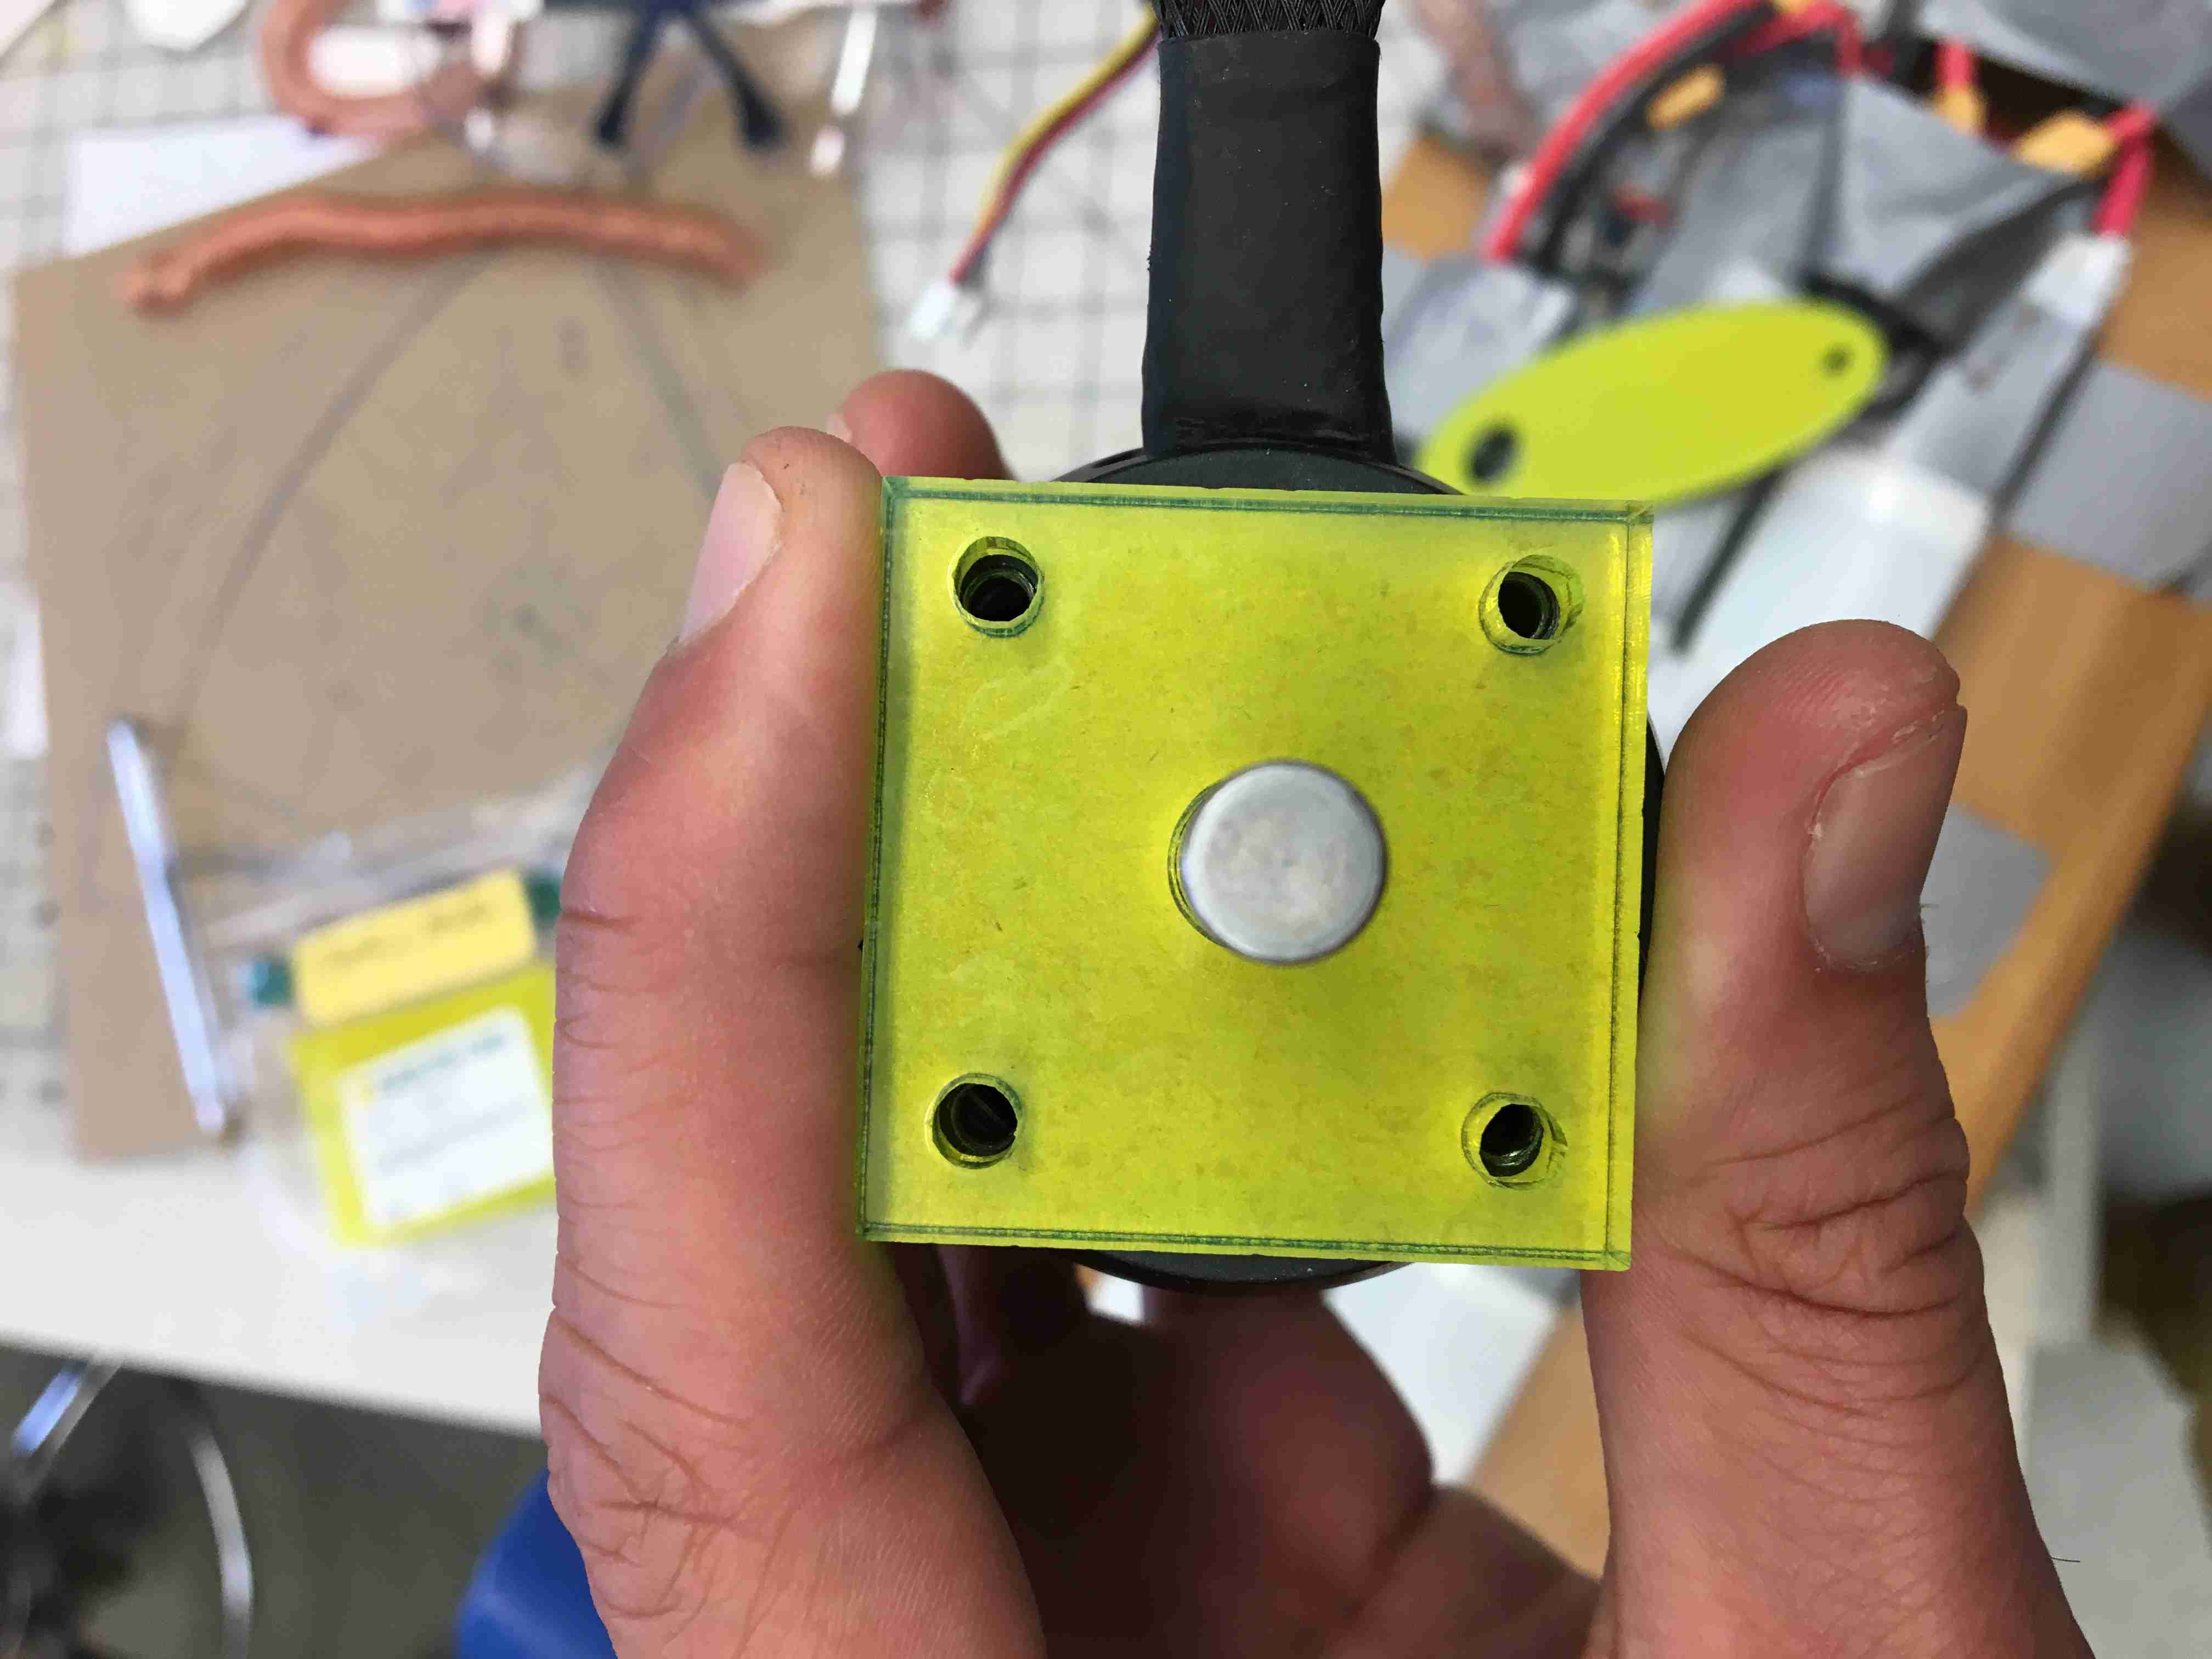
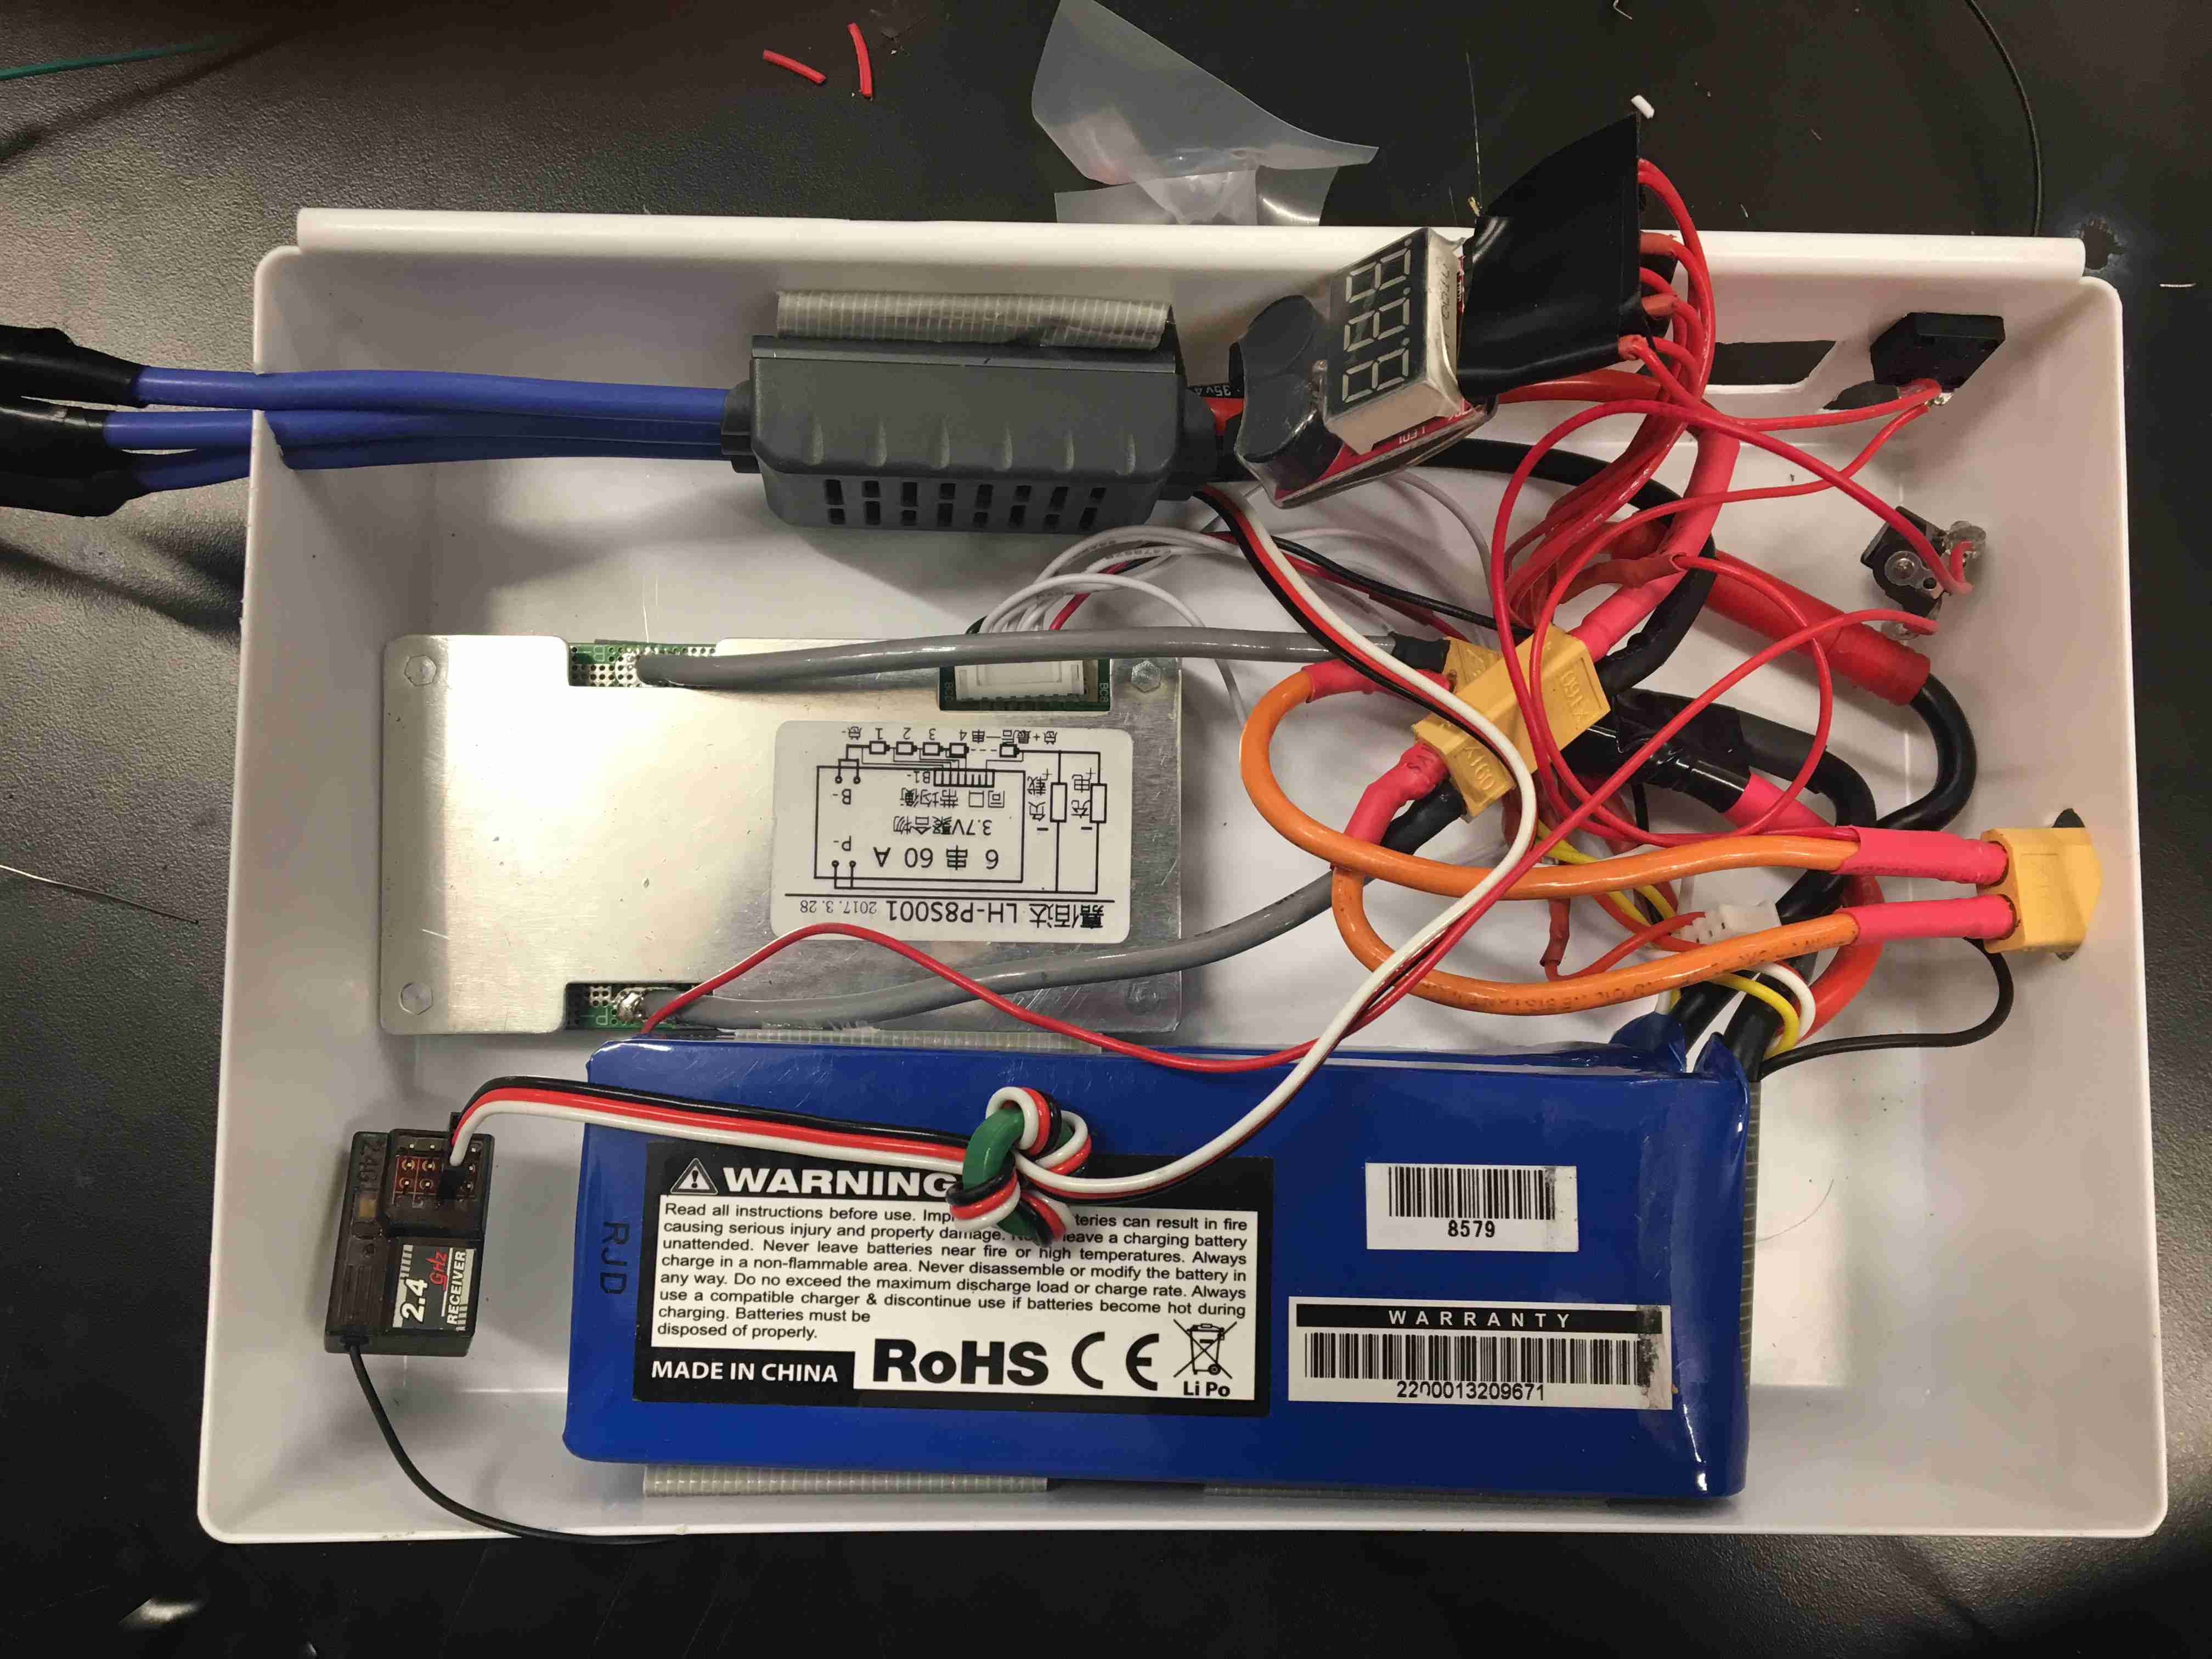 This is a picture of Doug's skateboard, but has the same circuit diagram. We used a plastic box from Dickson Bro's.
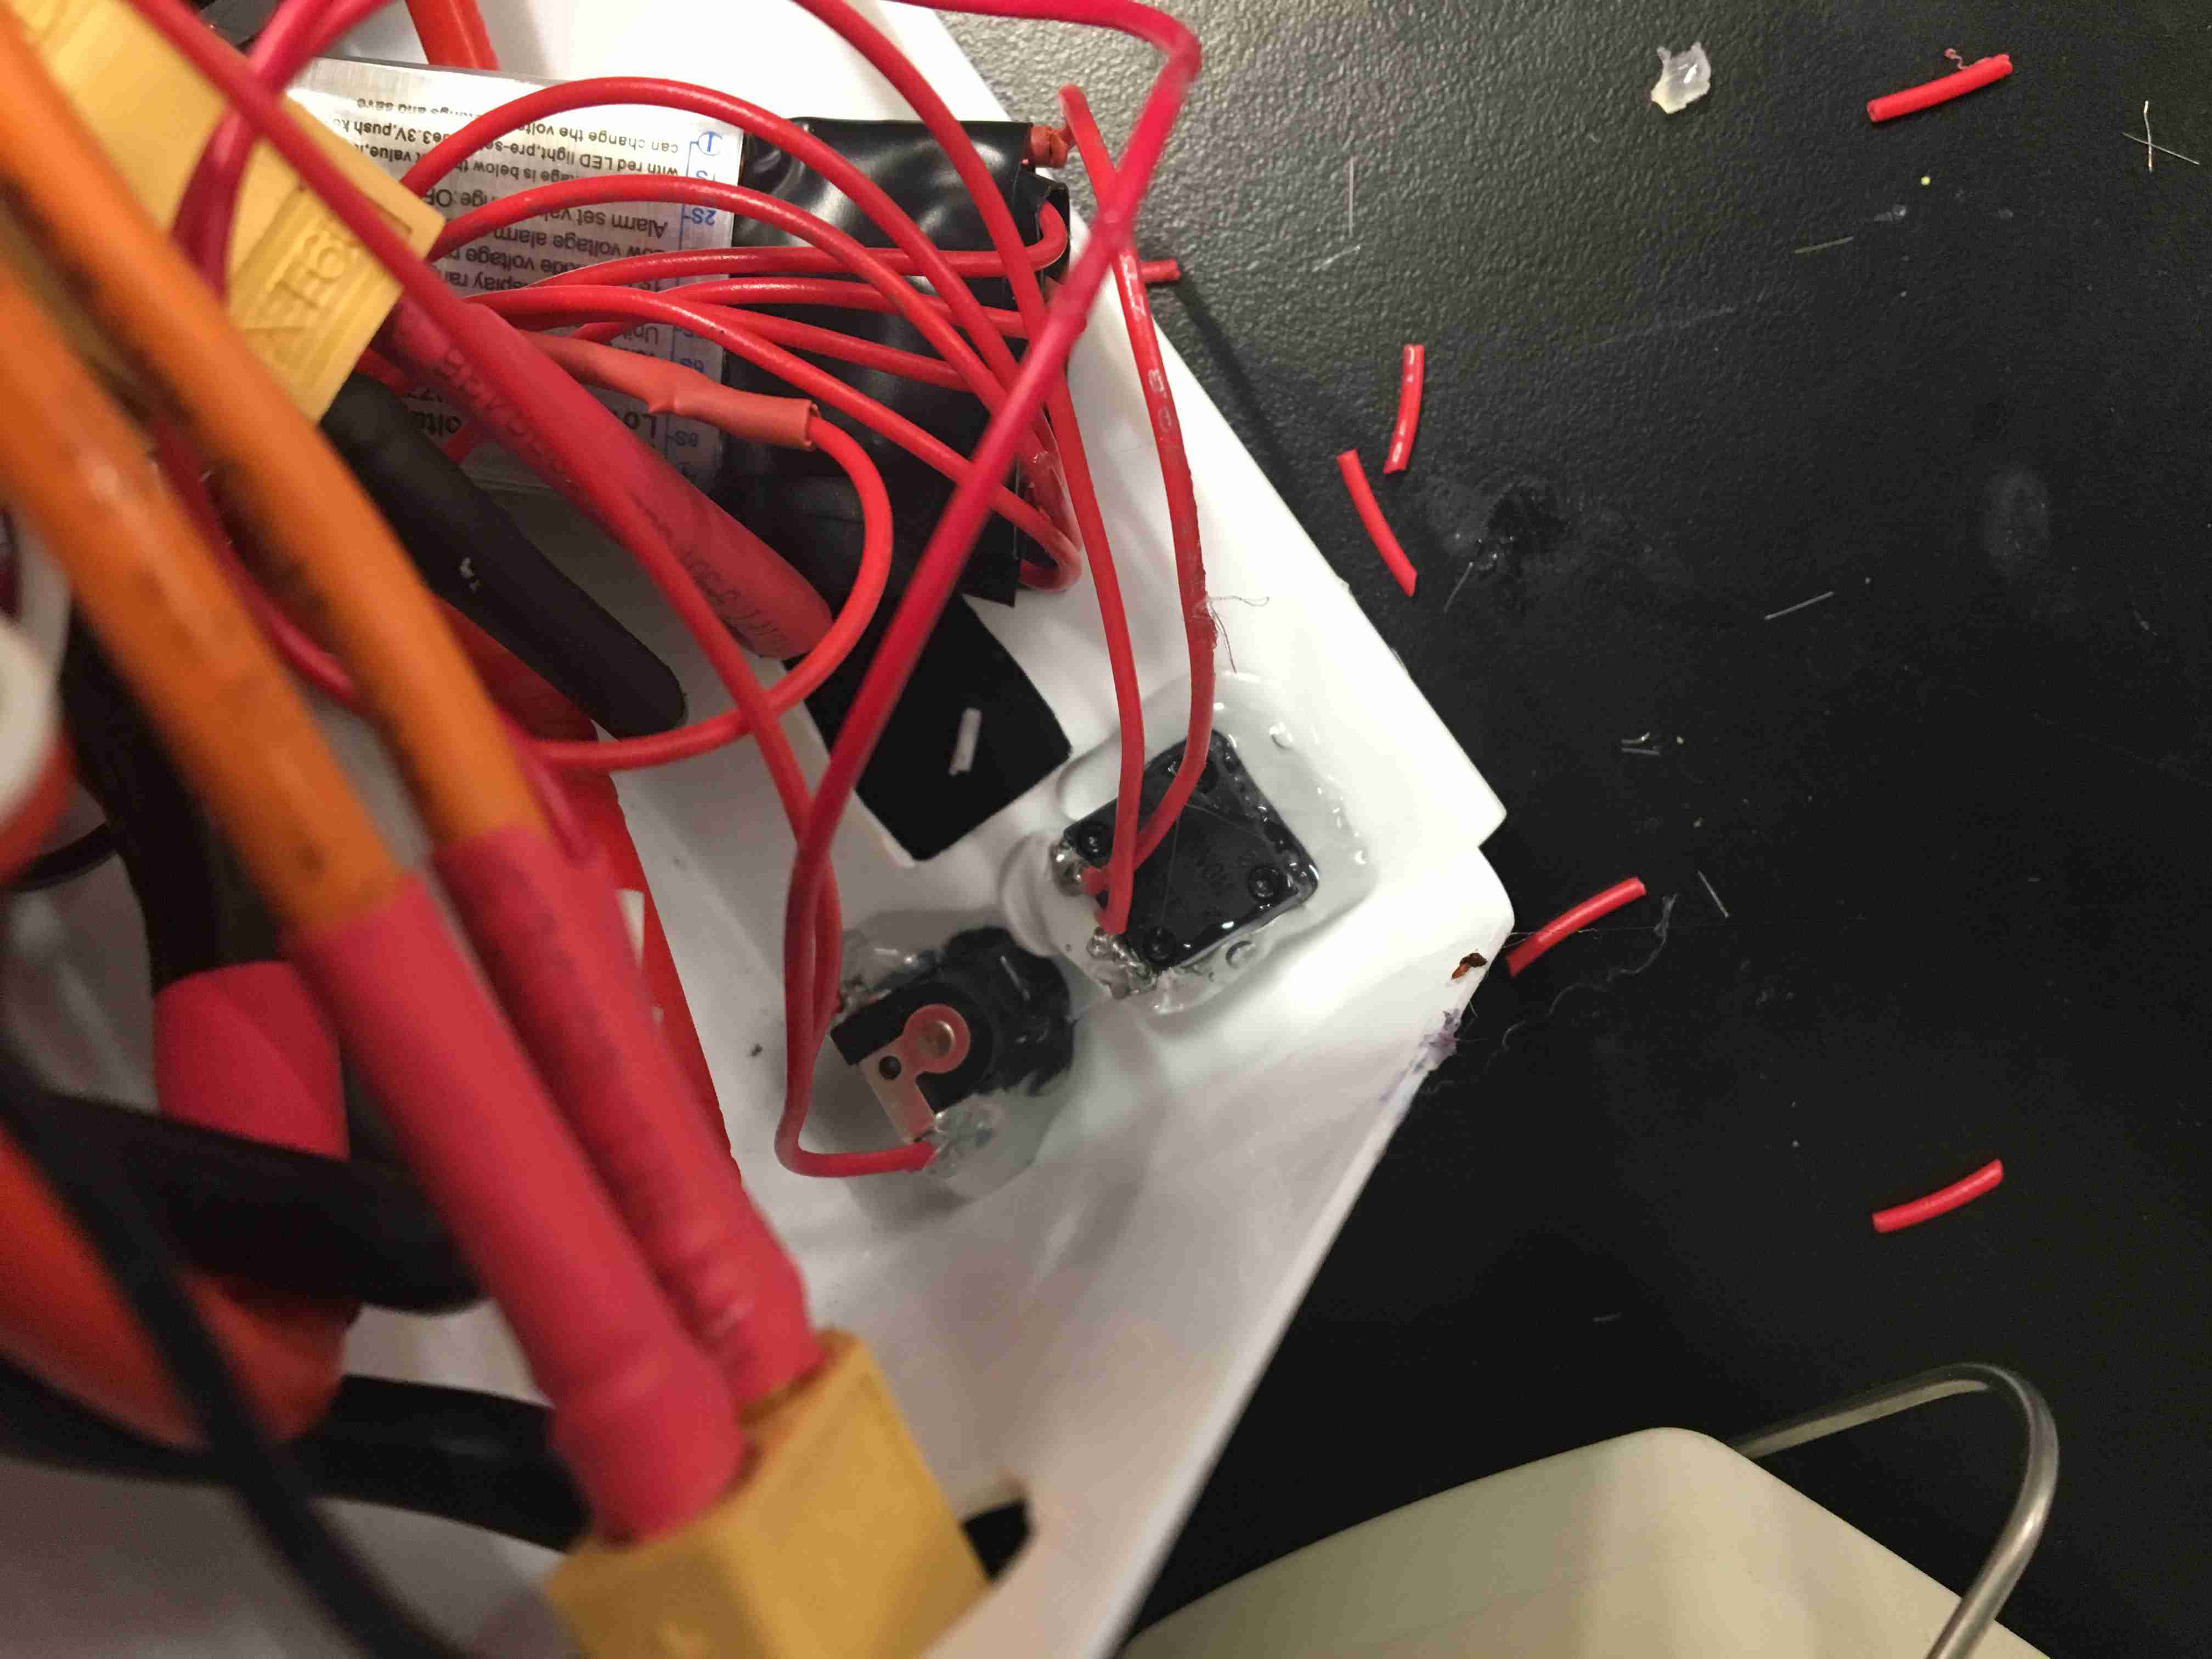 We hot glued the button and DC plug to the casing. The anti-spark plug is on the buttom of the image. We needed way more
hot glue than I thought for the anti-spark plug because consistent use broke the hold.
We hot glued the button and DC plug to the casing. The anti-spark plug is on the buttom of the image. We needed way more
hot glue than I thought for the anti-spark plug because consistent use broke the hold.
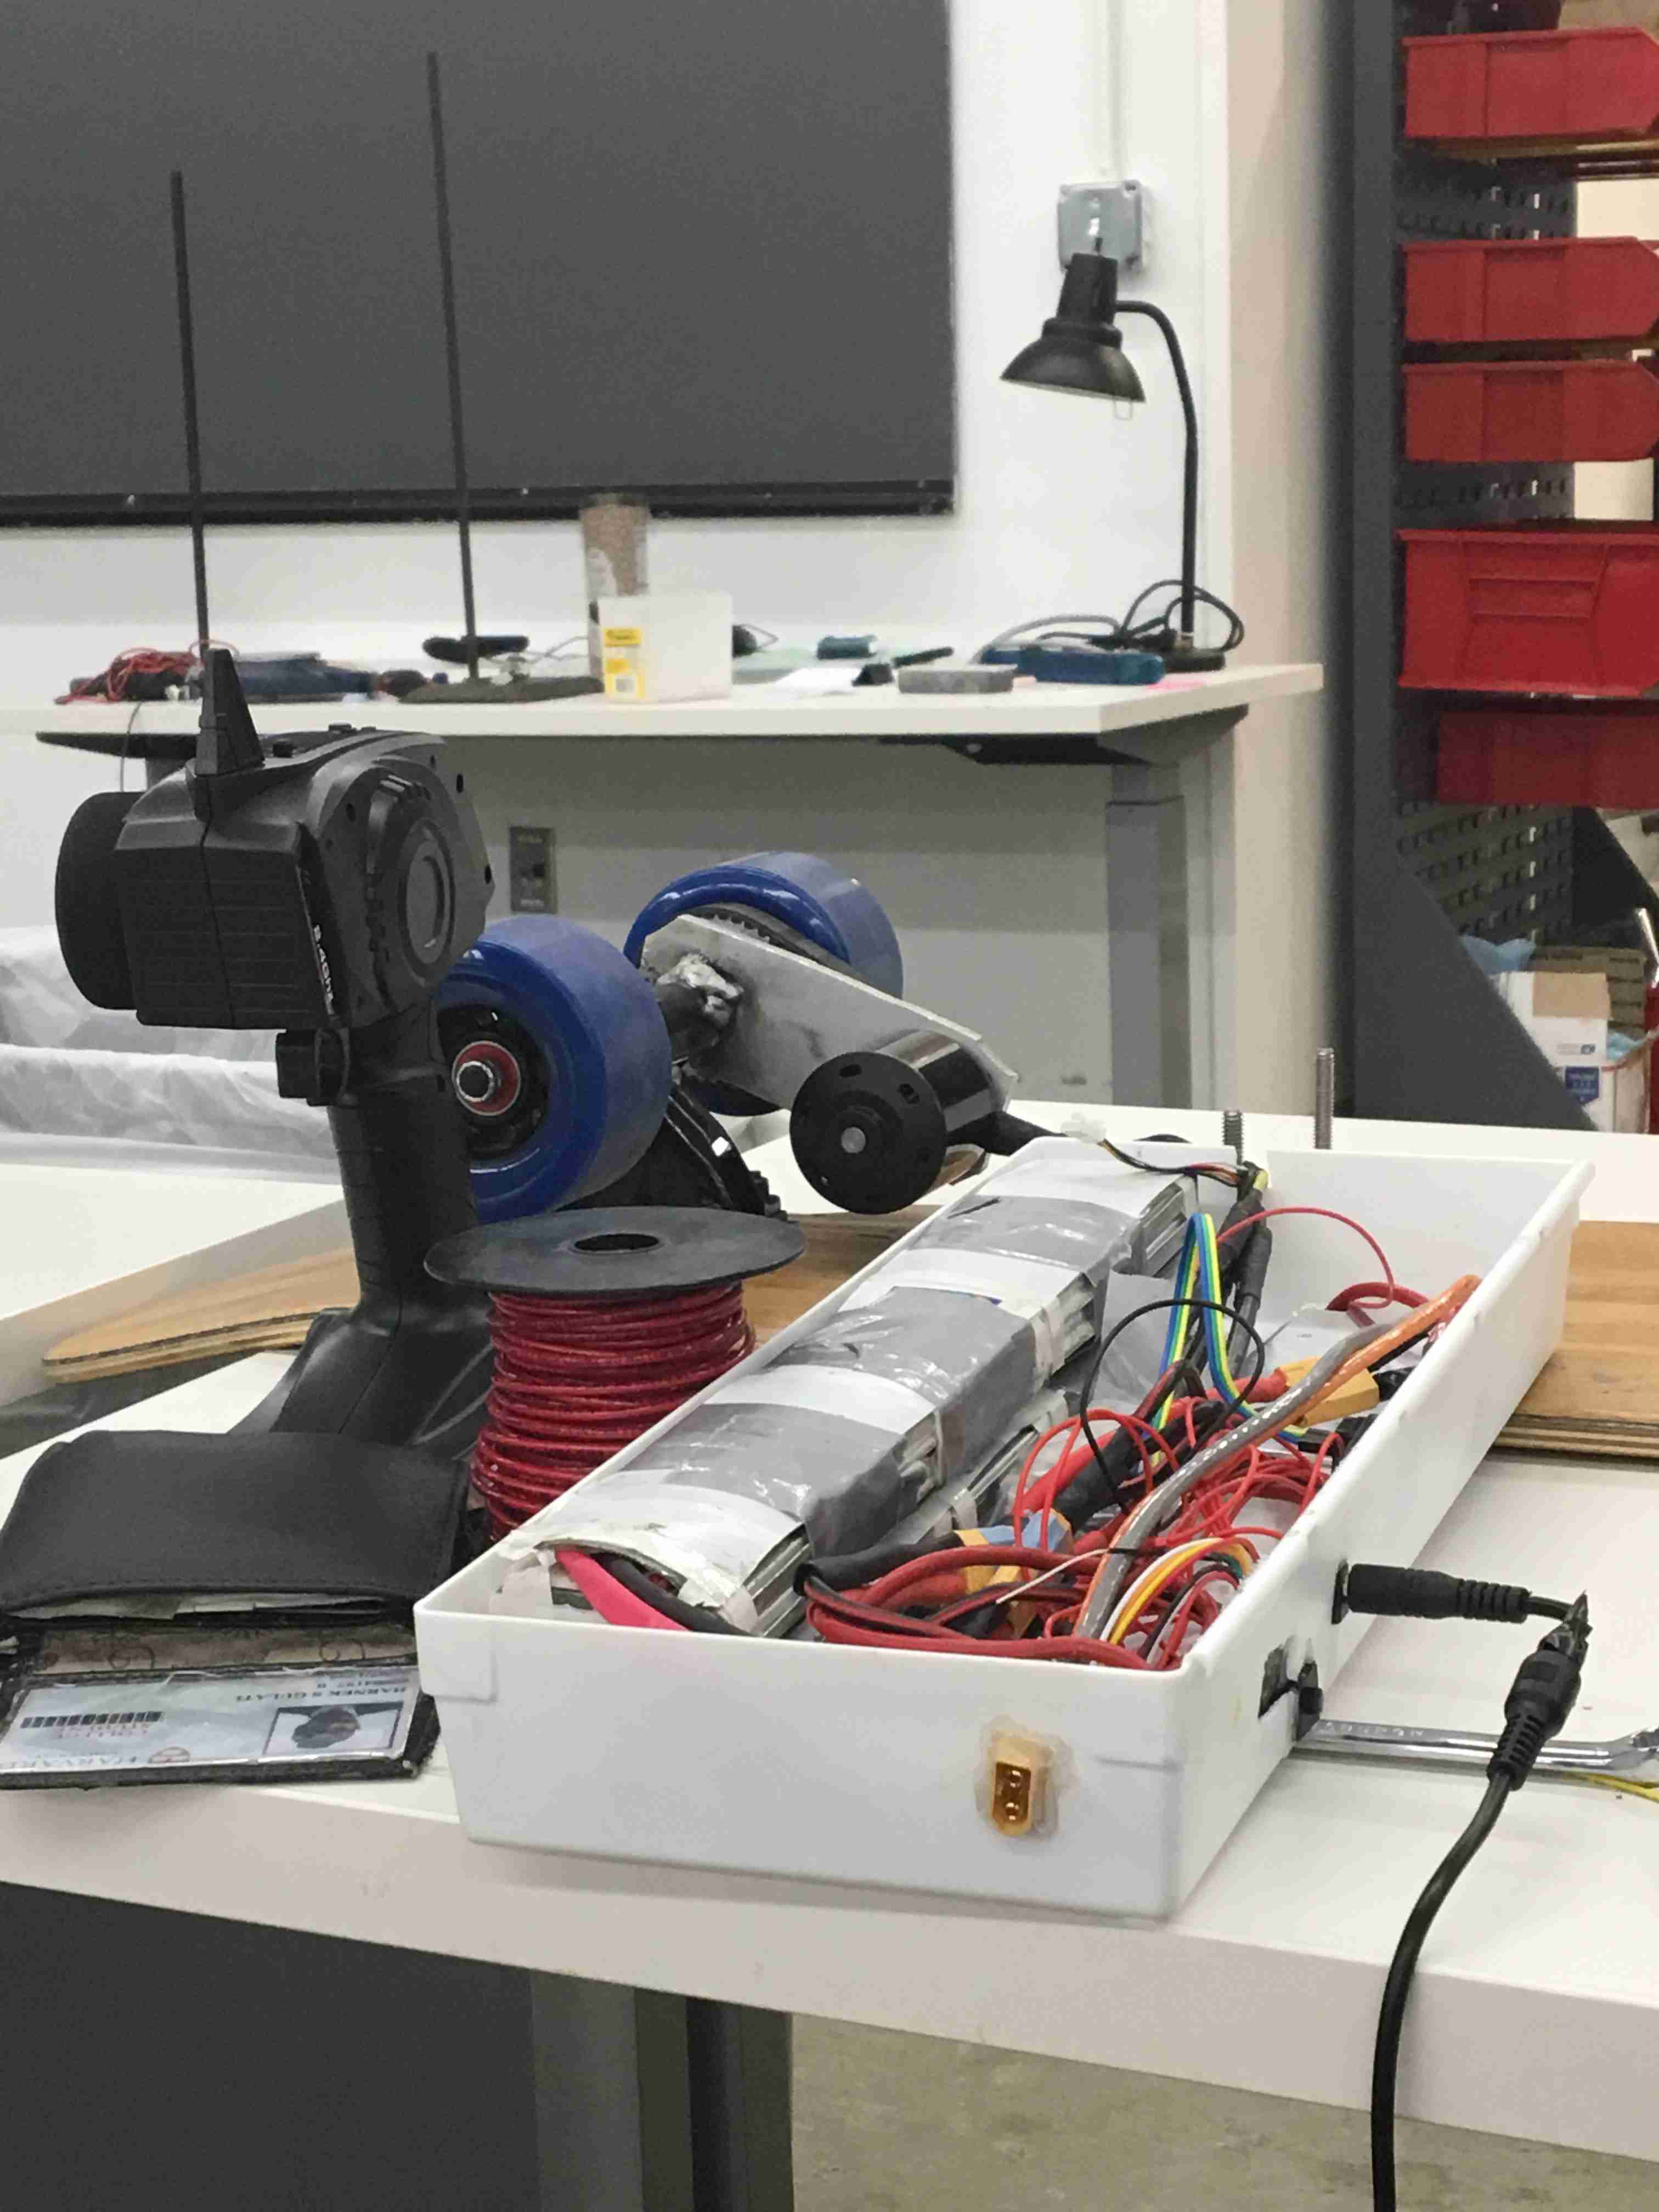 This has everything together. I started off trying to code everything with a wii-remote that a friend of mine (John Alex the legend) built,
but it wasn’t really that successful in urban areas. Using the $30 radio transceivers is good because it constantly switches frequencies.
The electrical is on the side there, which will be explained later.
This has everything together. I started off trying to code everything with a wii-remote that a friend of mine (John Alex the legend) built,
but it wasn’t really that successful in urban areas. Using the $30 radio transceivers is good because it constantly switches frequencies.
The electrical is on the side there, which will be explained later.
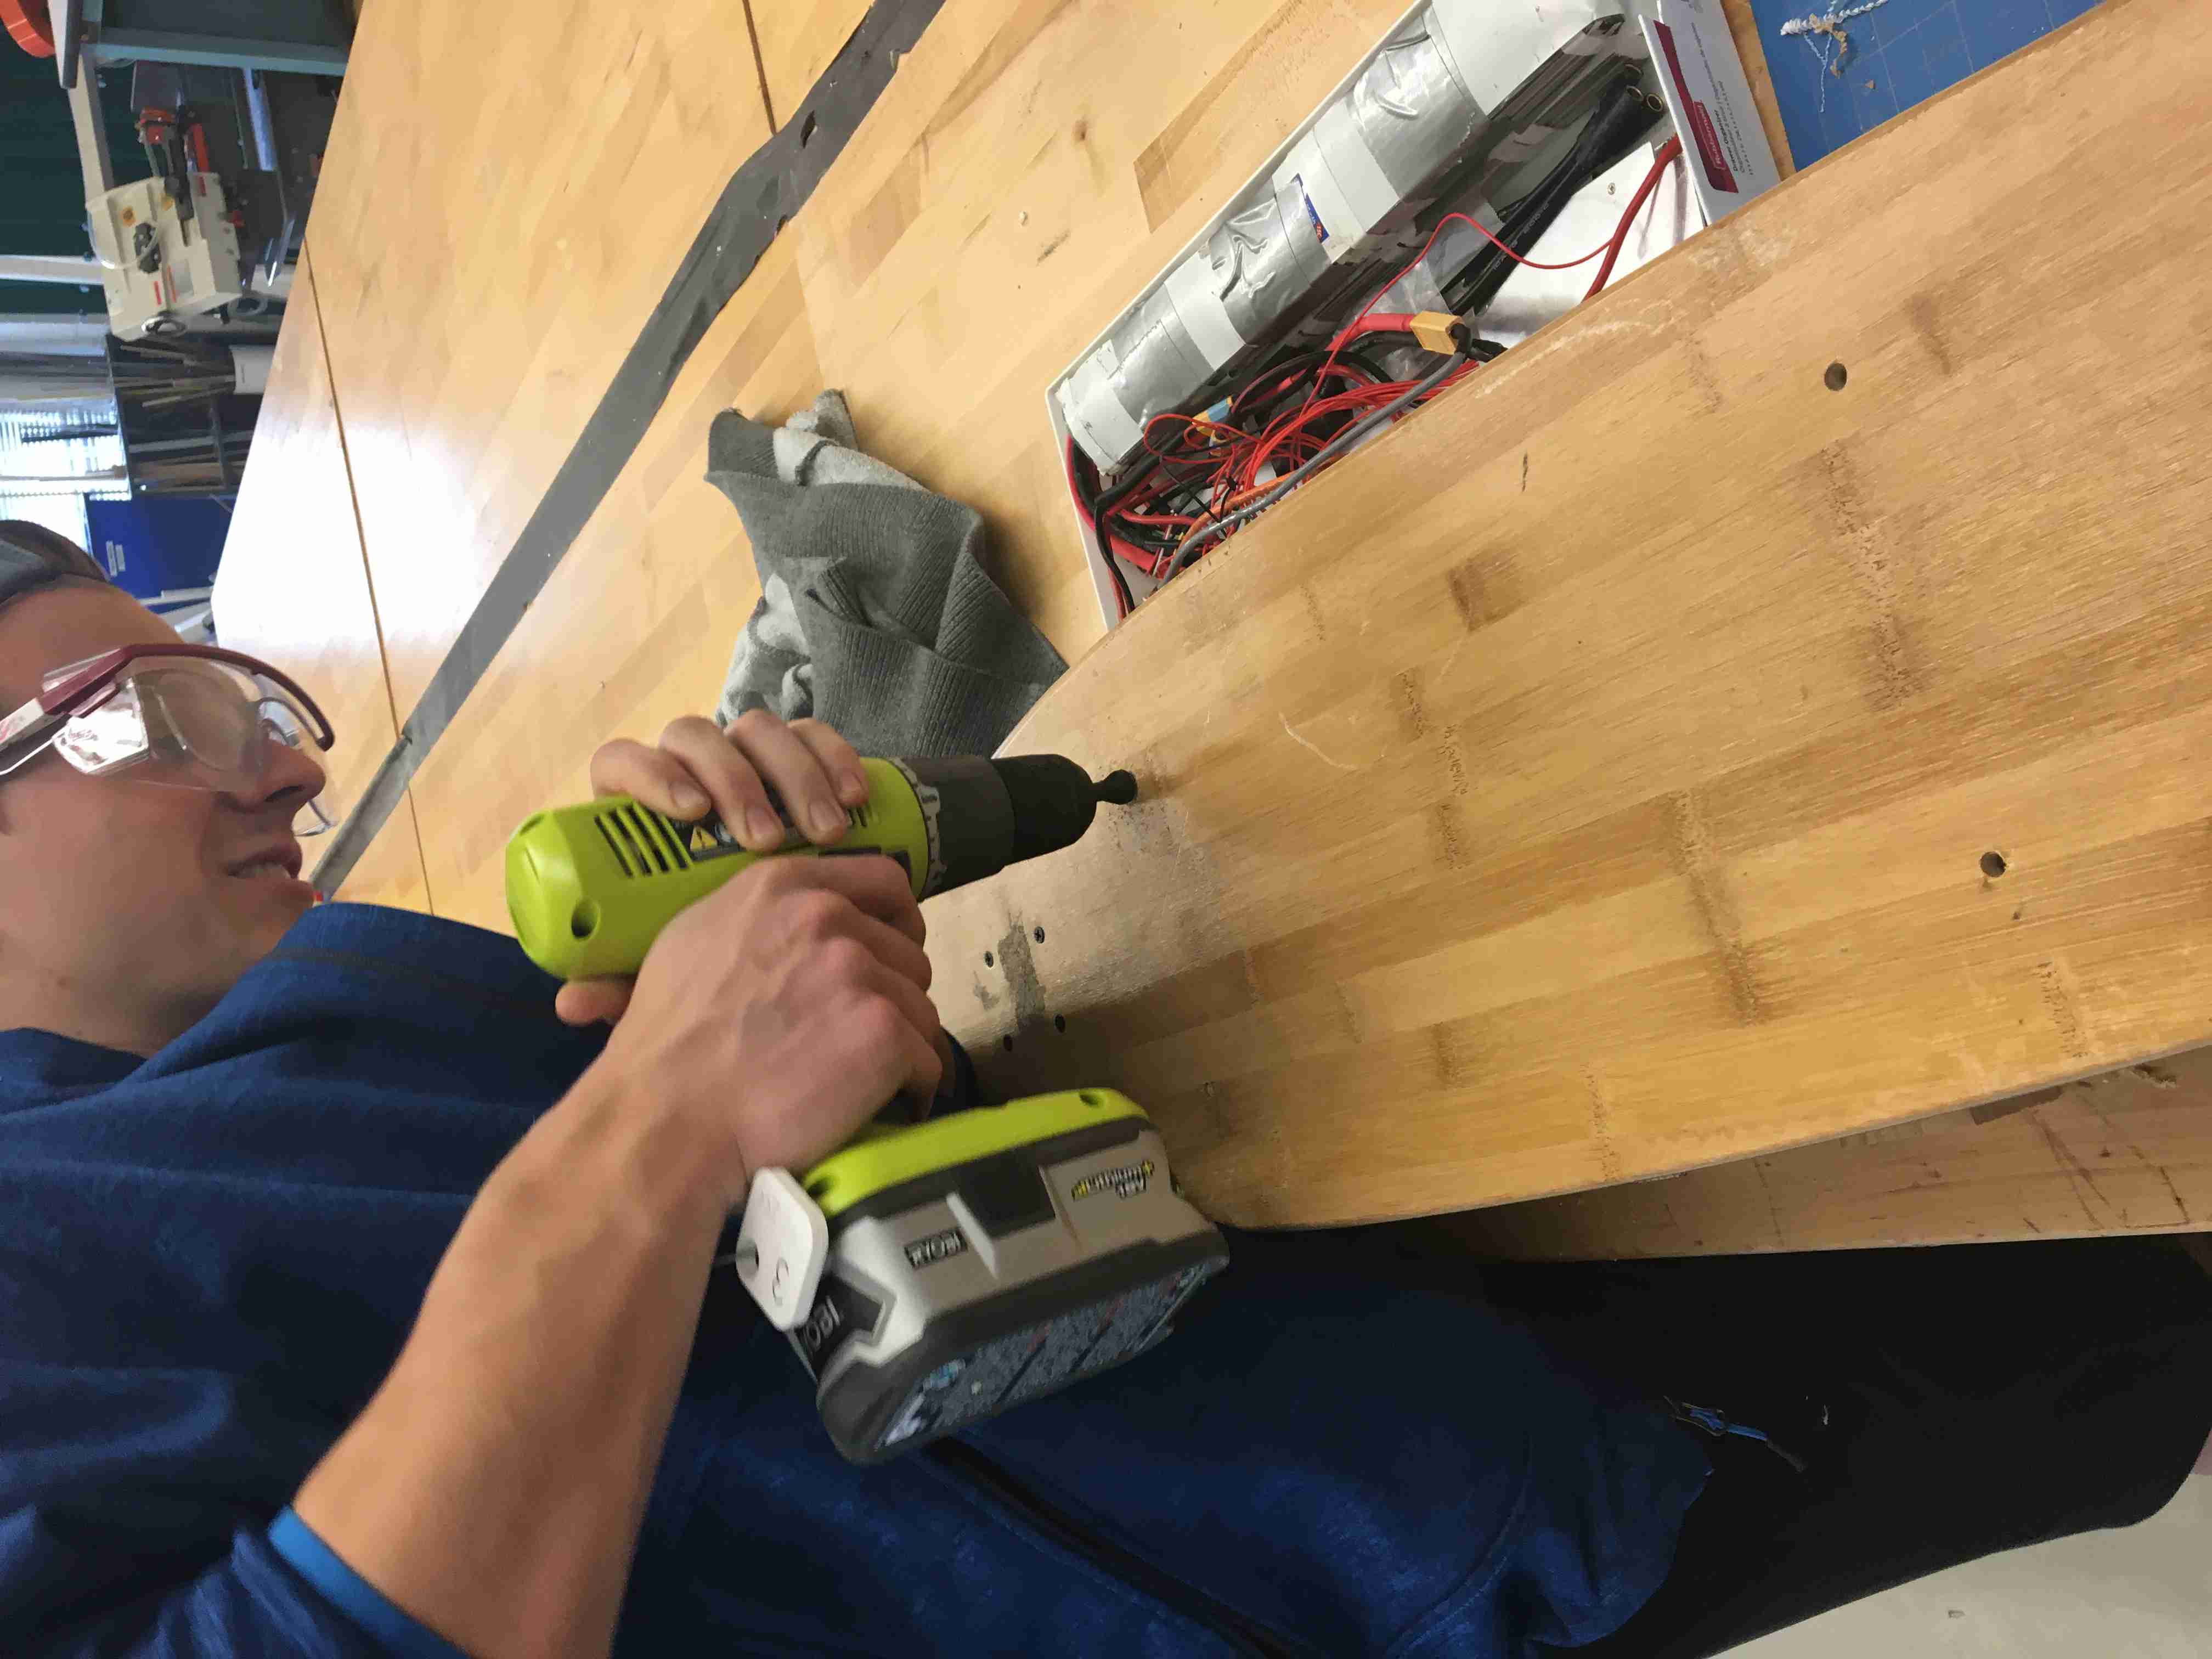 We drilled into the board and countersinked them so we could drill into the box and hold it in place.
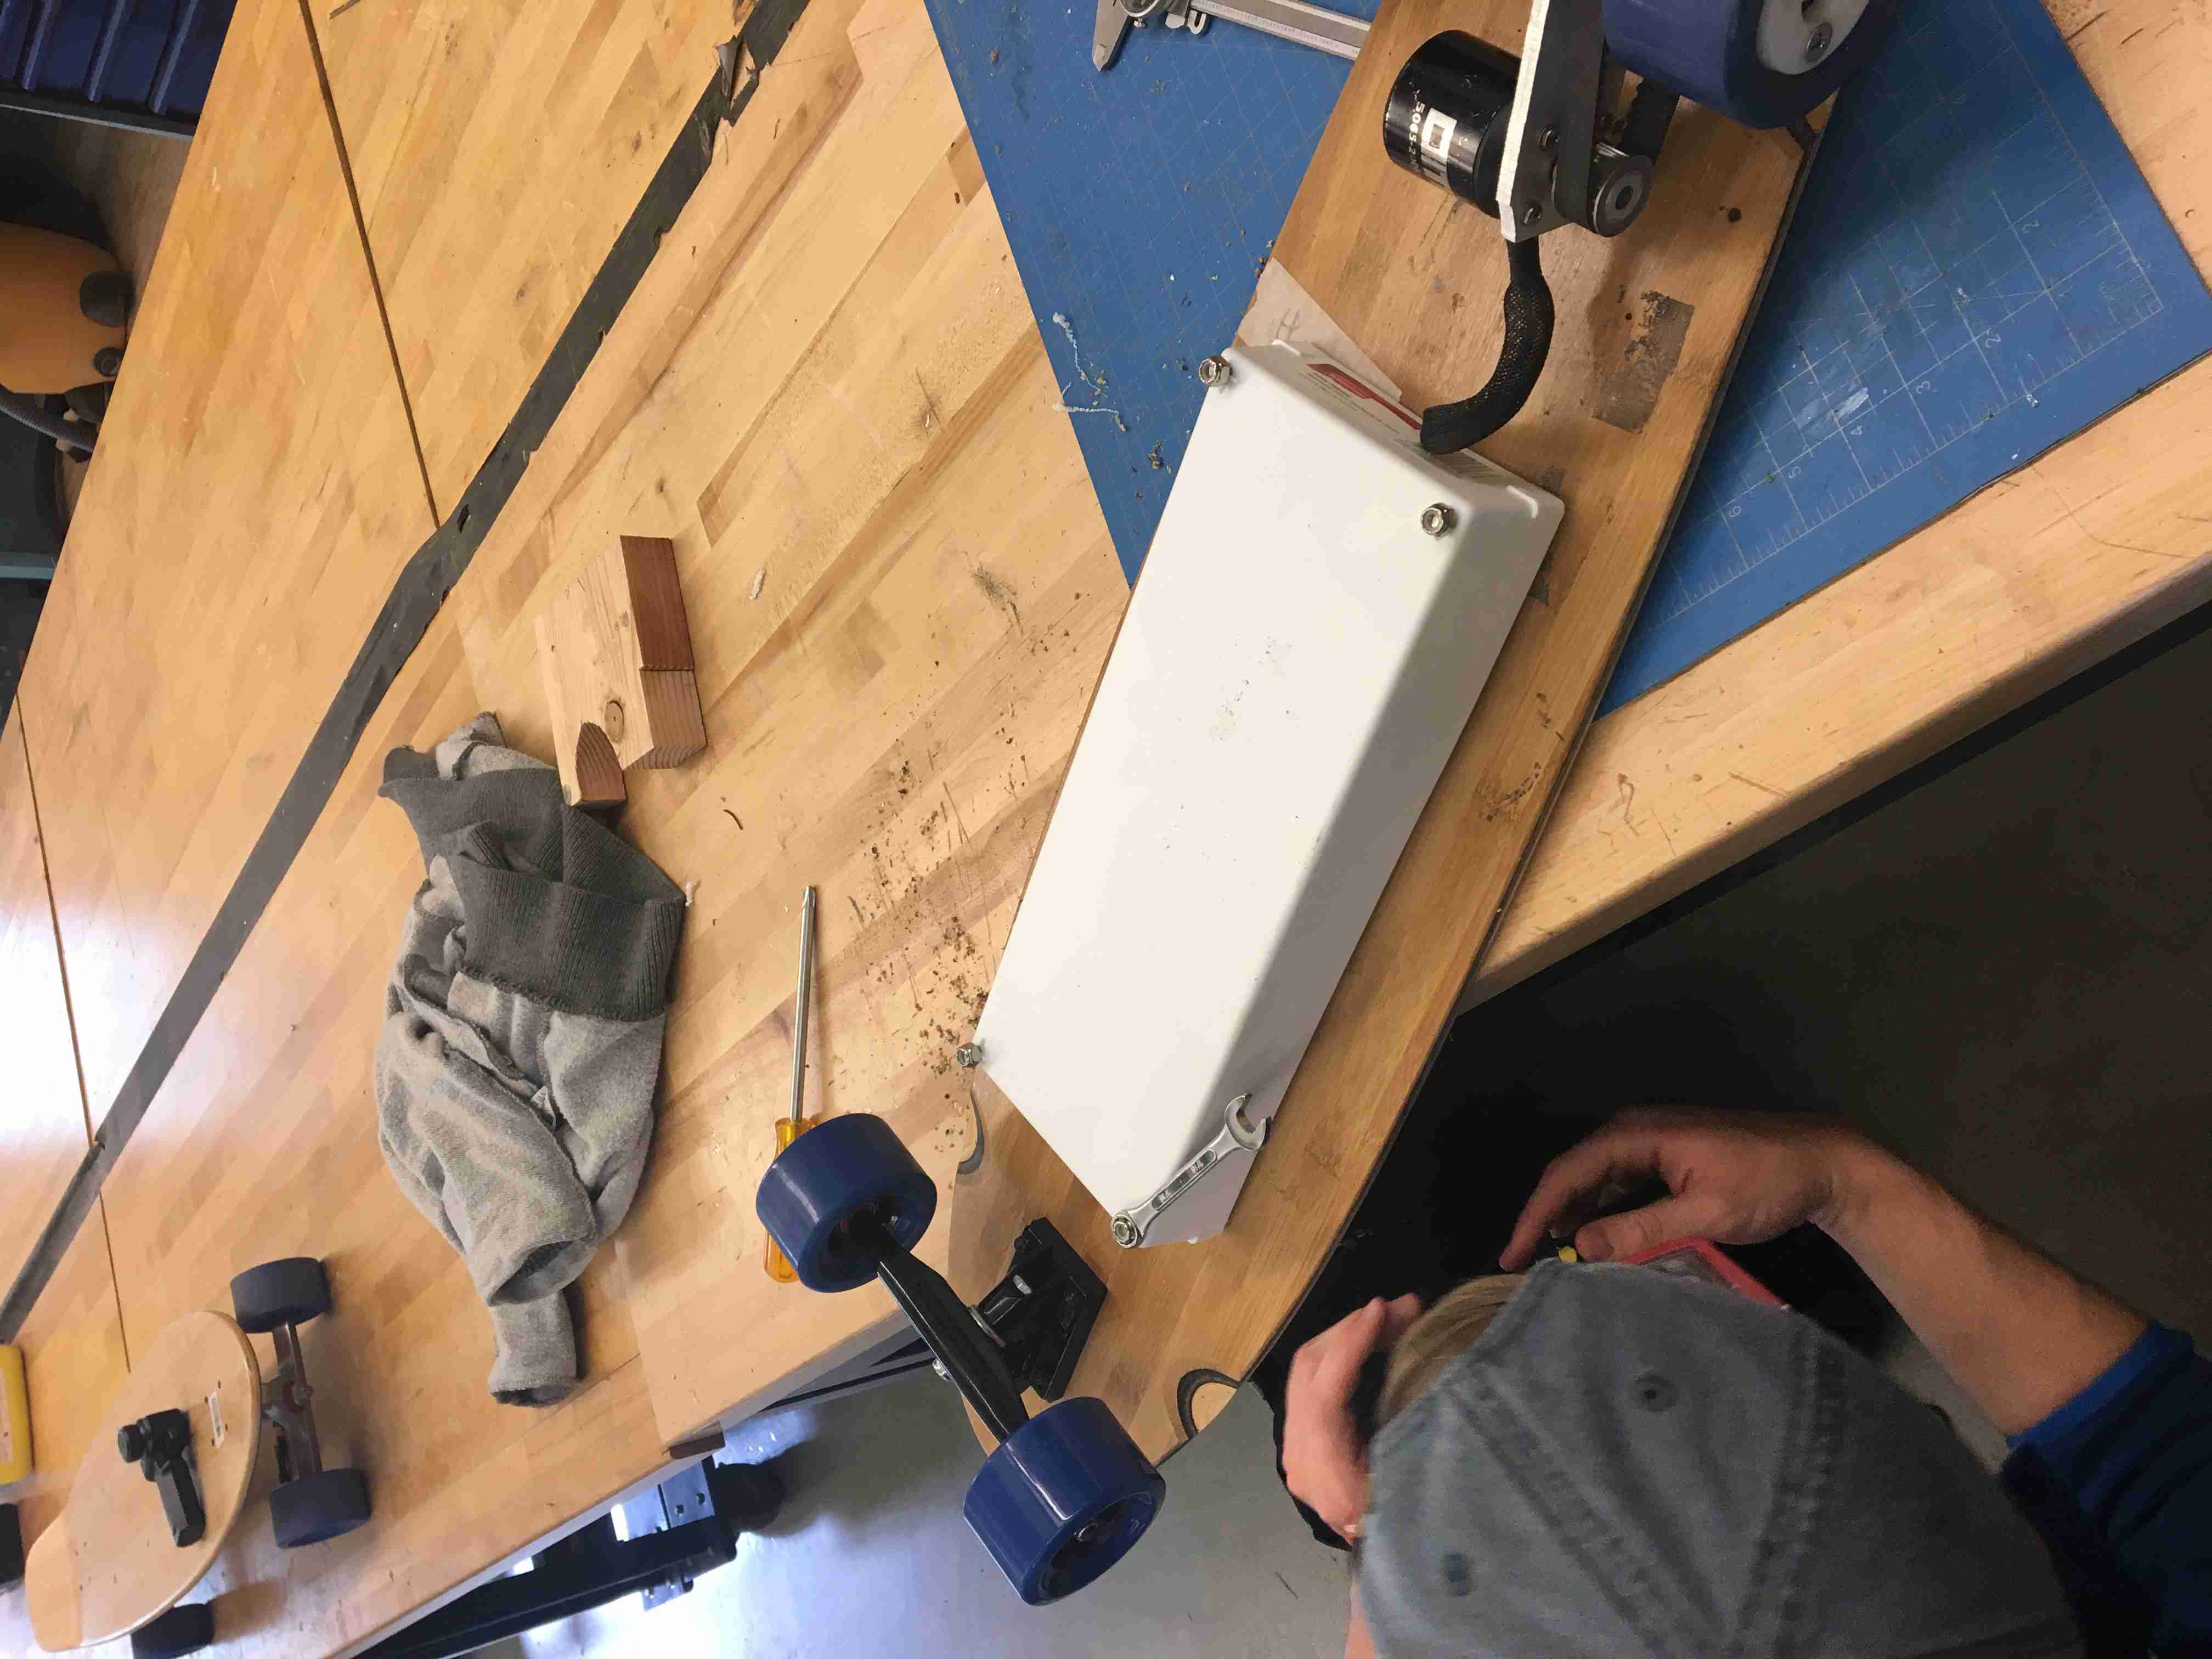 We used ¼”-20 screws and nylon lock nuts to hold it in place.
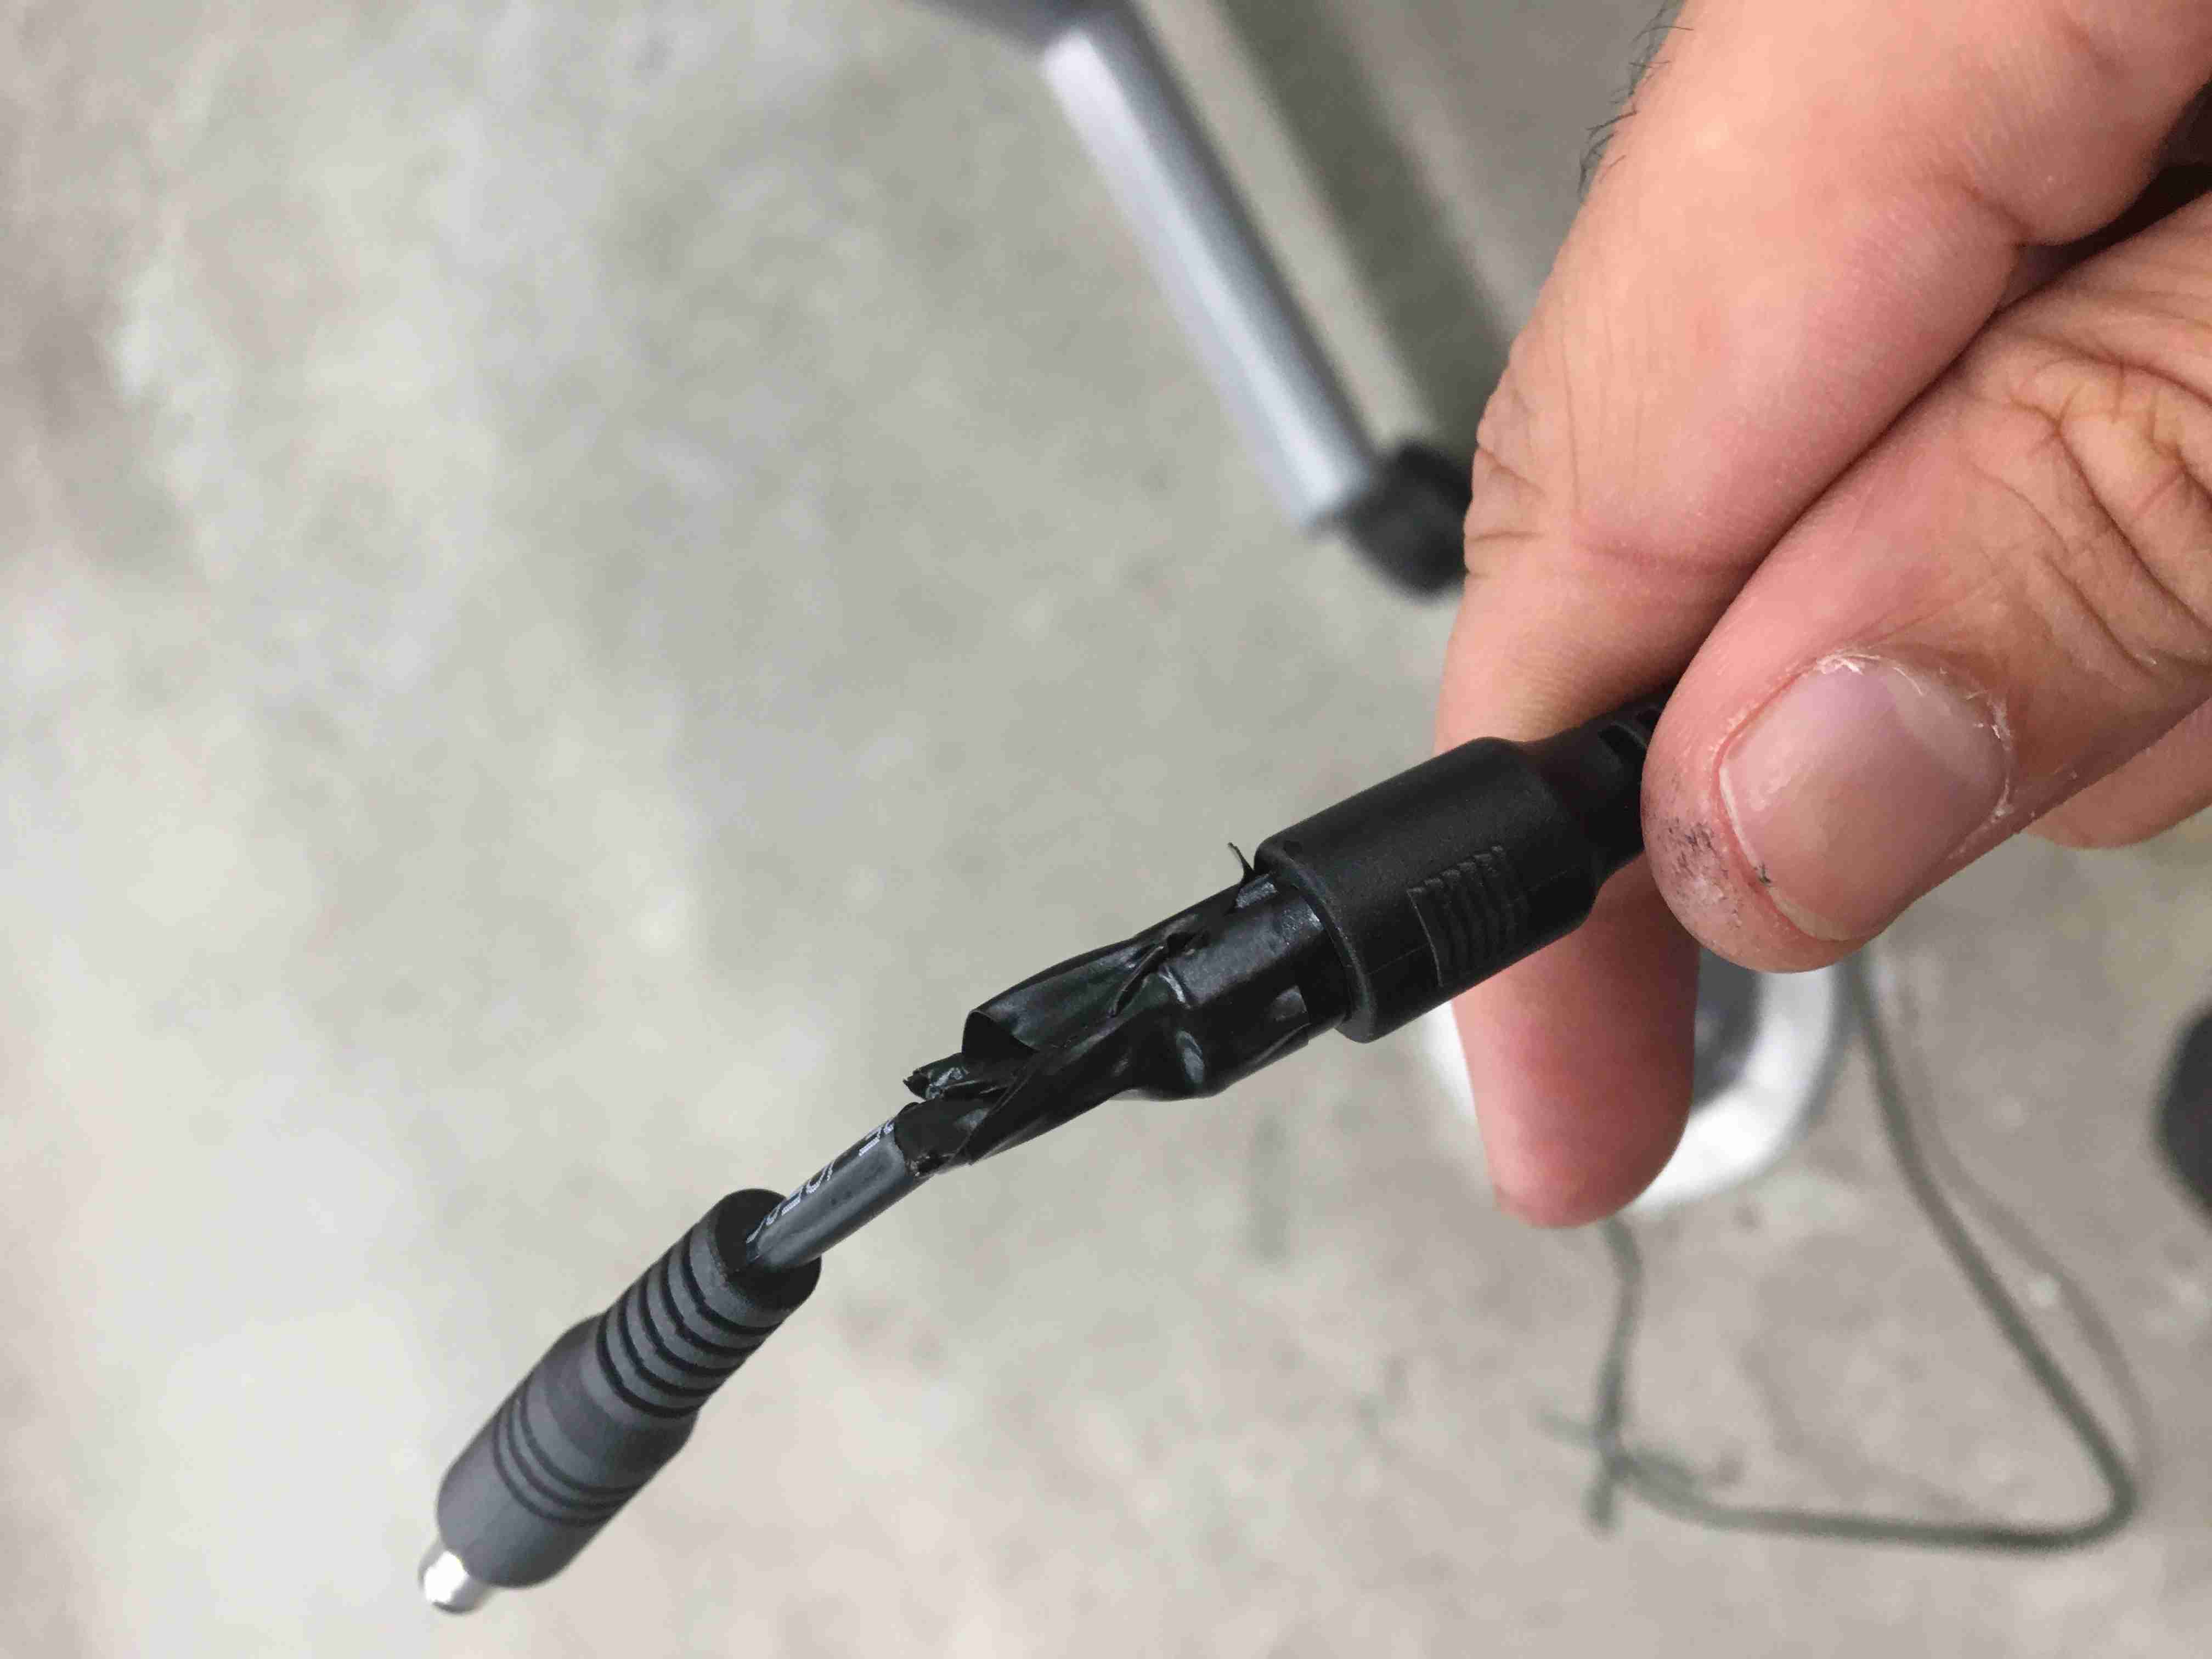 I needed to change the power source head from a 3-Pin system into a DC plug, so I quickly hacked together another head for compatibility.
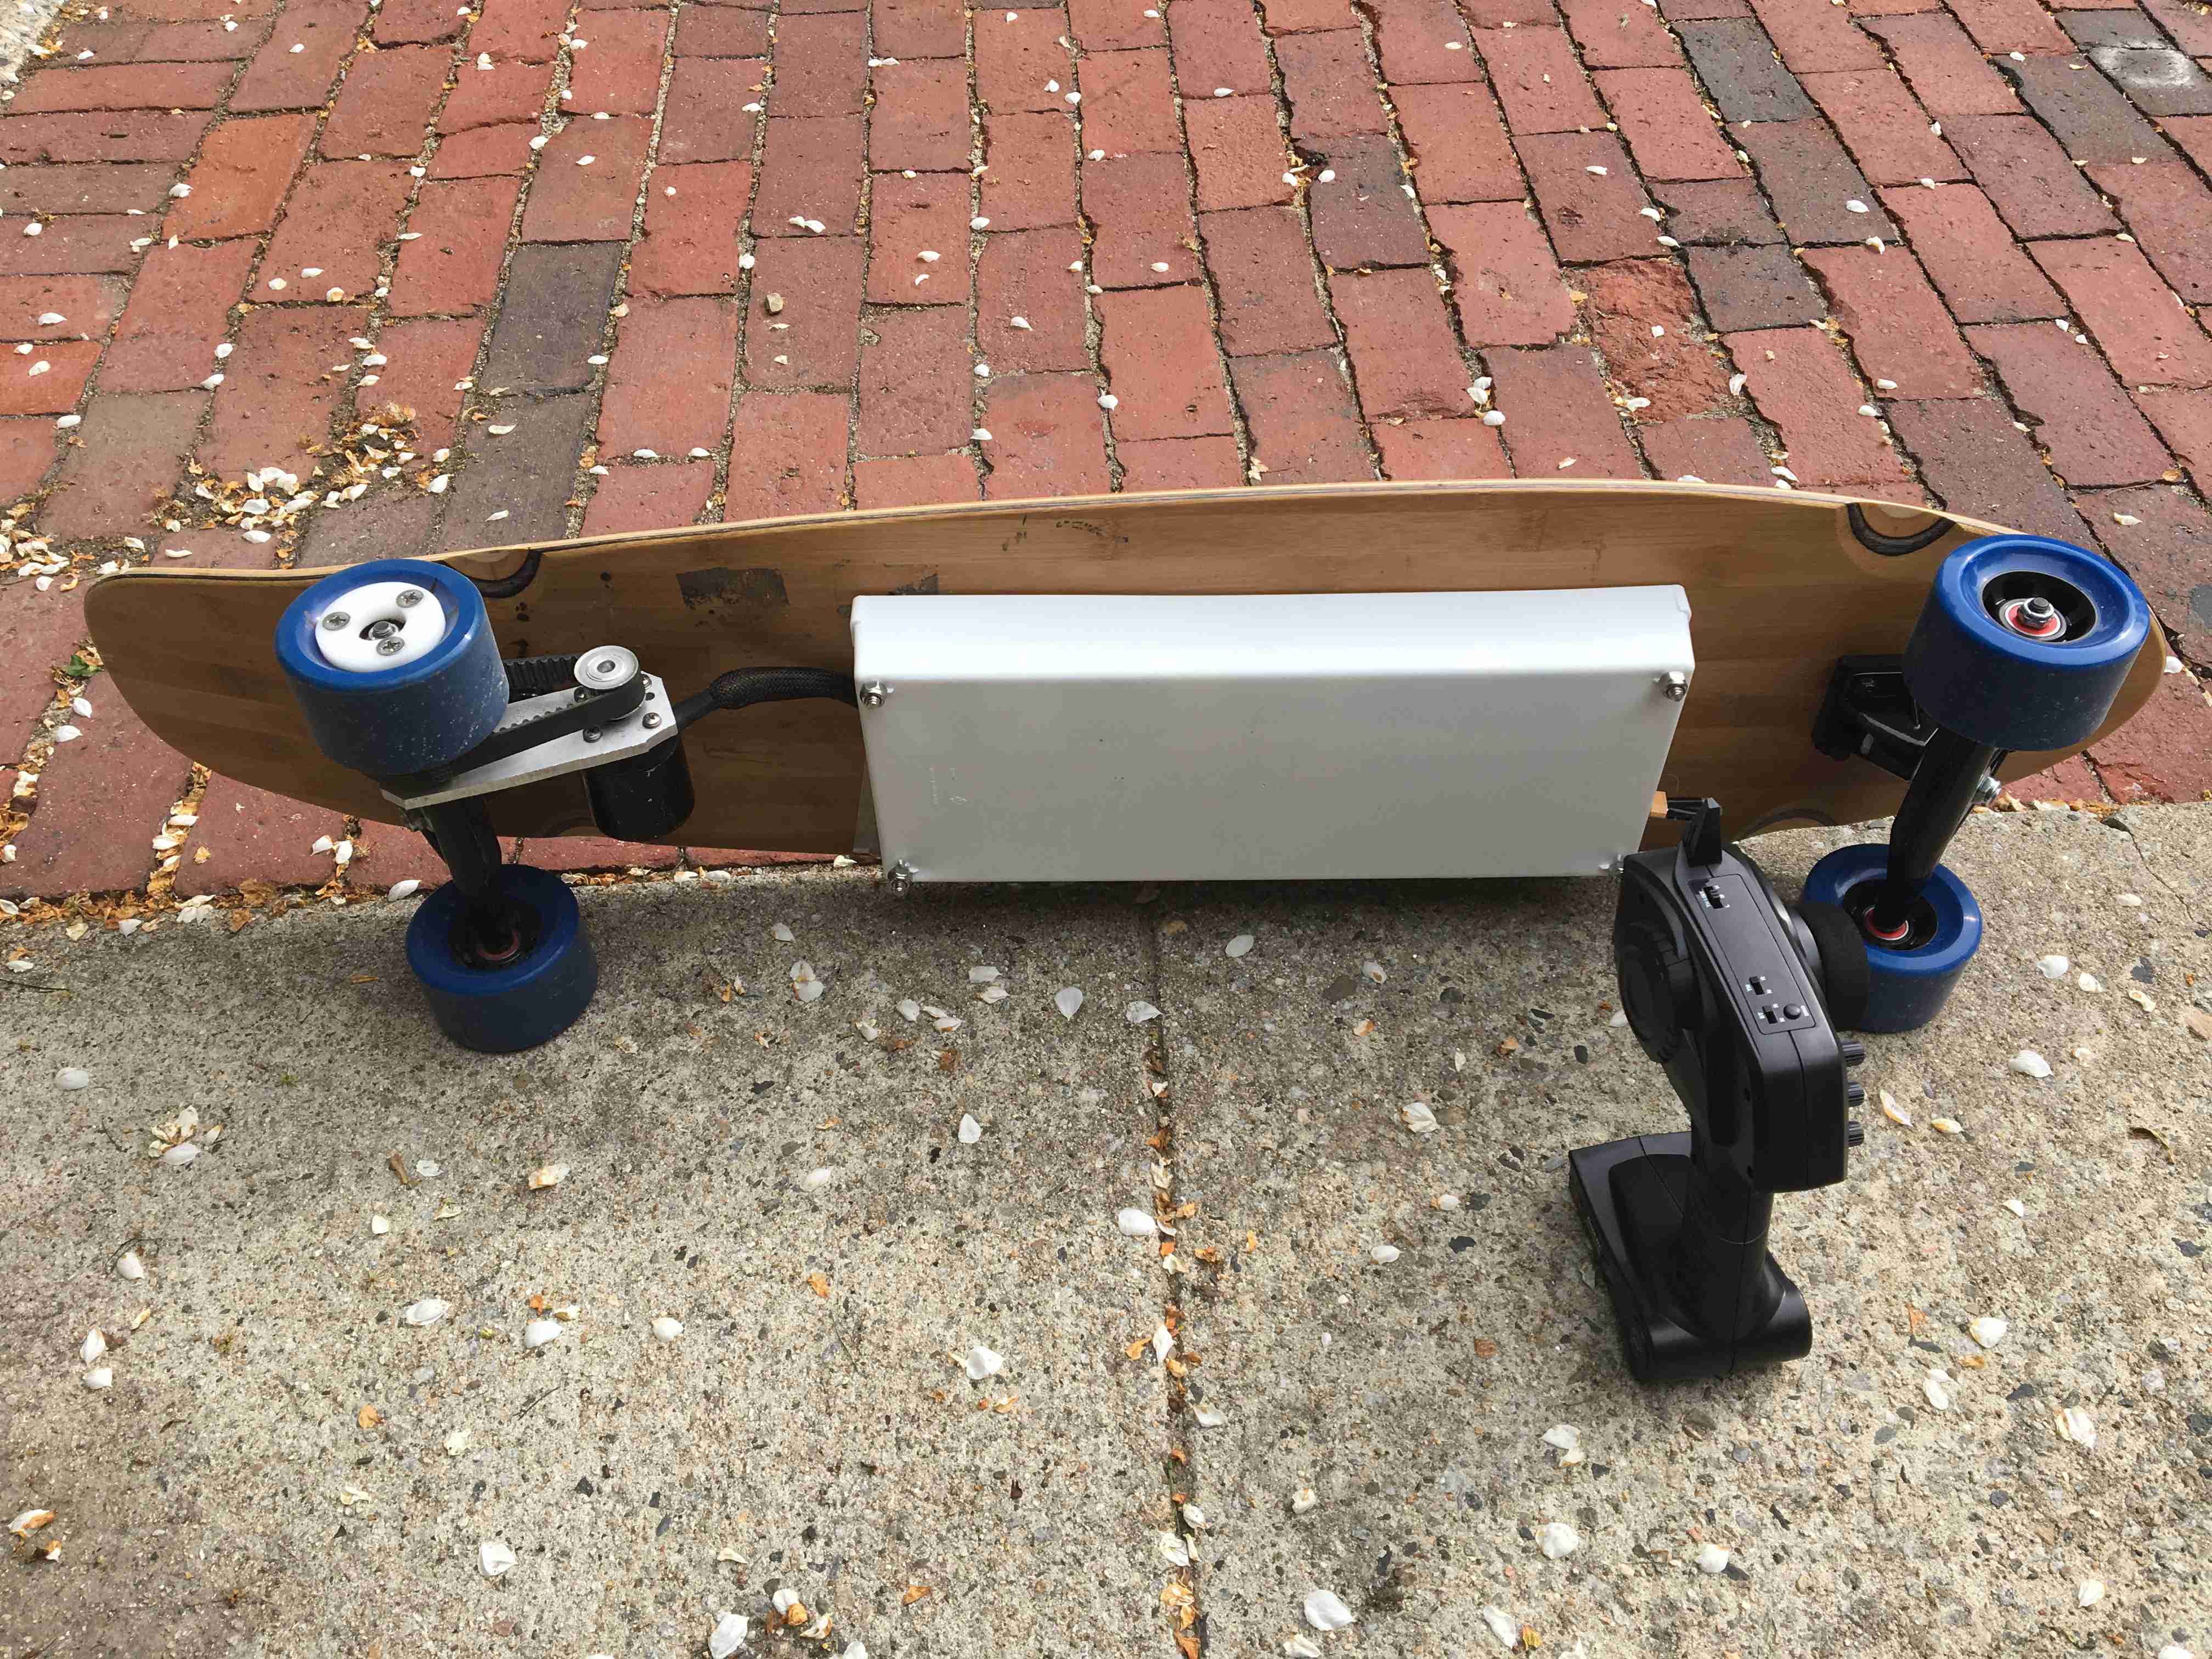 Everything together!!